When I create Windows Instances in AWS EC2, I usually forget to add a drive or two. With this step-by-step tutorial, I will walk you through how to create a new Volume for EC2 Instances, then make Windows use the new Volume without a reboot.
Initial Setup
Creating and Attaching the Volume in AWS EC2 Console
Adding the new Volume to Windows System
Initial Setup
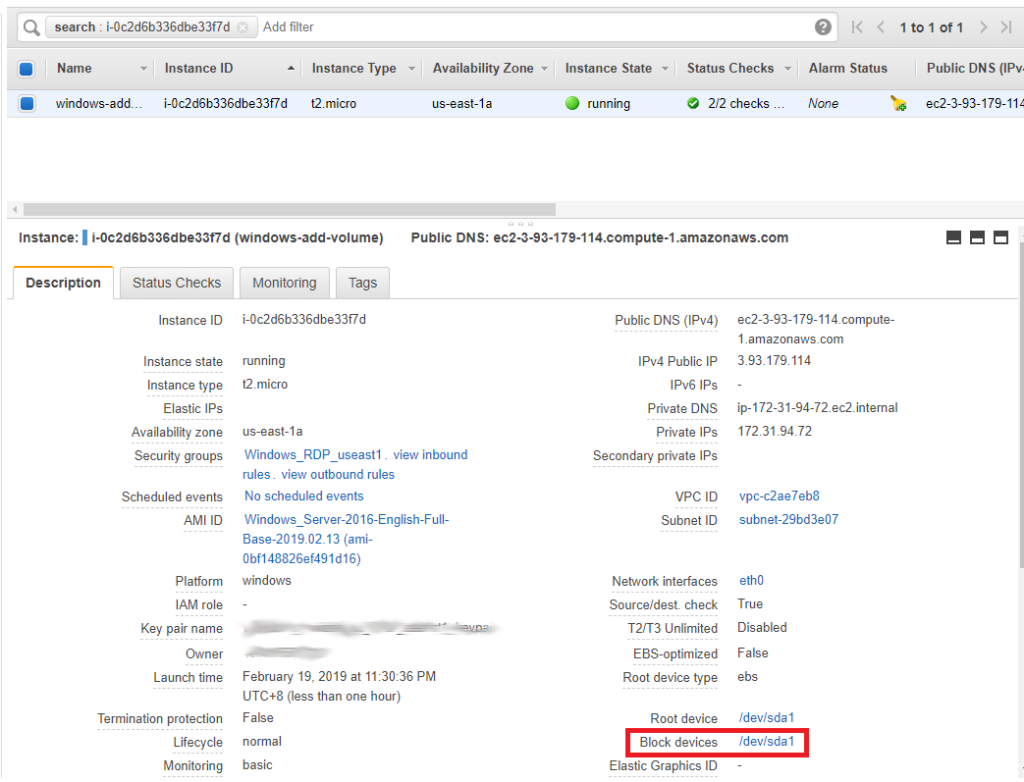
I launched a EC2 Windows 2016 Server with only 1 Block Device (/dev/sda1), which is also my Root Device.
AWS EC2 Console
Note the Availability Zone where your instance is located, you will need this later. Mine is in us-east-1a.
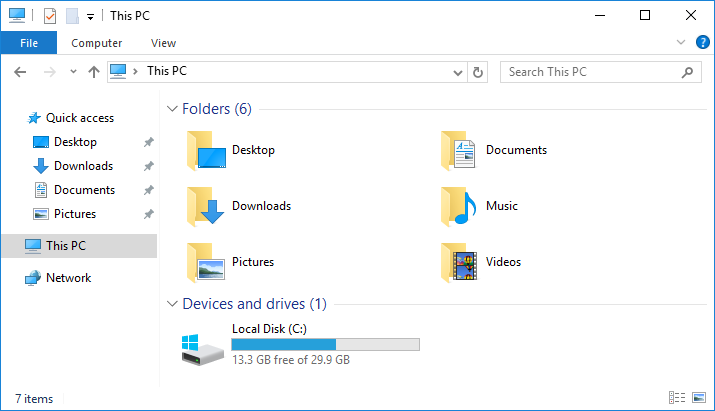
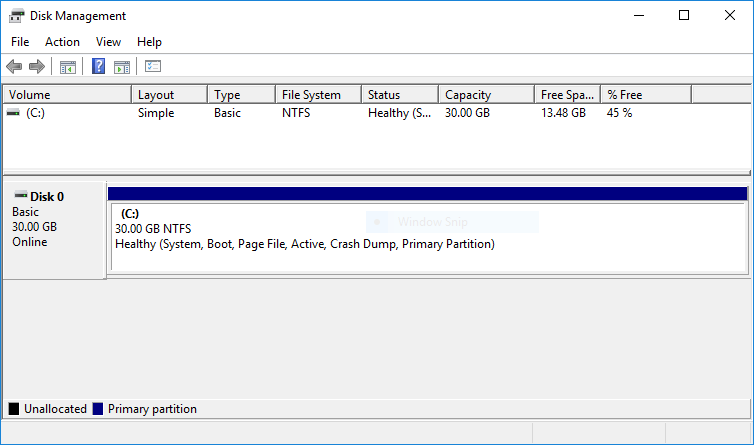
Looking inside Windows it only has 1 volume.
File ExplorerDisk Management
Creating and Attaching the Volume in AWS EC2 Console
Now we need to attach a new Volume for our Windows Server.
Go to AWS EC2 Console, on the left sidebar click on <strong>Volumes</strong>.
If you plan to make the communication of your site visitors to be secure by using HTTPS then you need to use Public SSL/TLS Certificate. You can do this by requesting for a Public Certificate via AWS Certificate Manager (ACM).
Below are the advantages of using Public SSL/TLS Certificate provided by AWS Certificate Manager.
No charges = Free.
Auto renew – No need to worry on expiring SSL/TLS Certificate. ACM Automatically does this for you.
Easy integration with Amazon Web Services (AWS) products such as CloudFront, Elastic Load Balancer, API Gateway and many more.
Check the step-by-step guide on how you can request a Public SSL/TLS Certificate for HTTPS access of your website/domain.
Note: AWS Certificate Manager is a regional service, therefore make sure to be in the correct AWS Region. If you are new to AWS just select N. Virginia (us-east-1) as it is one of the cheapest regions.
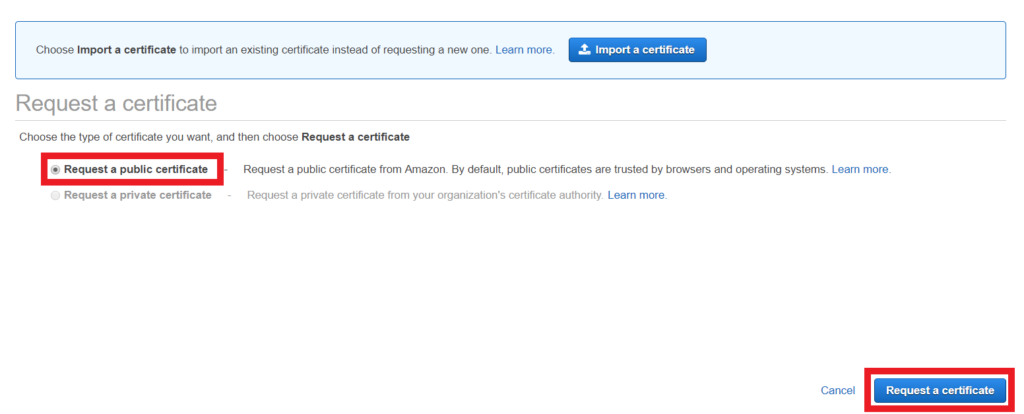
On the AWS Certificate Manager page, click on <strong>Get started</strong>.
On the next screen, make sure to select the Request a public certificate, then click on Request a certificate.
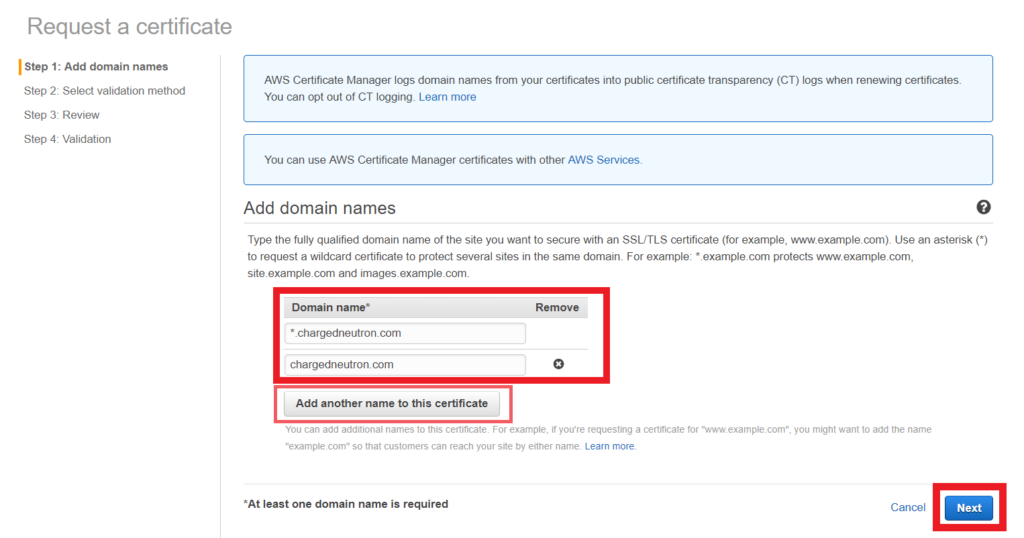
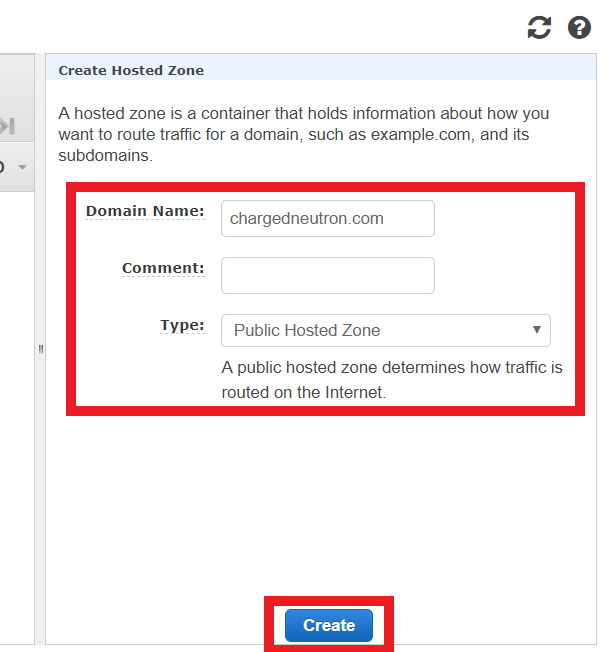
Under Add domain names. Enter the following.
*.[Your Domain] Example: *.chargedneutron.com
The * represents a wildcard. This will allow you to use the SSL Certificate to any subdomains that you want like www.domain.com, images.domain.com, sites.domain.com, mobile.domain.com
[Your Domain] Example: chargedneutron.com
Apex Domain or Naked Domain Name. Your domain name without subdomains. Use this if you do not want to use www in front of your website.
Then click on Next.
Select DNS Validation, then click on <strong>Review</strong>.
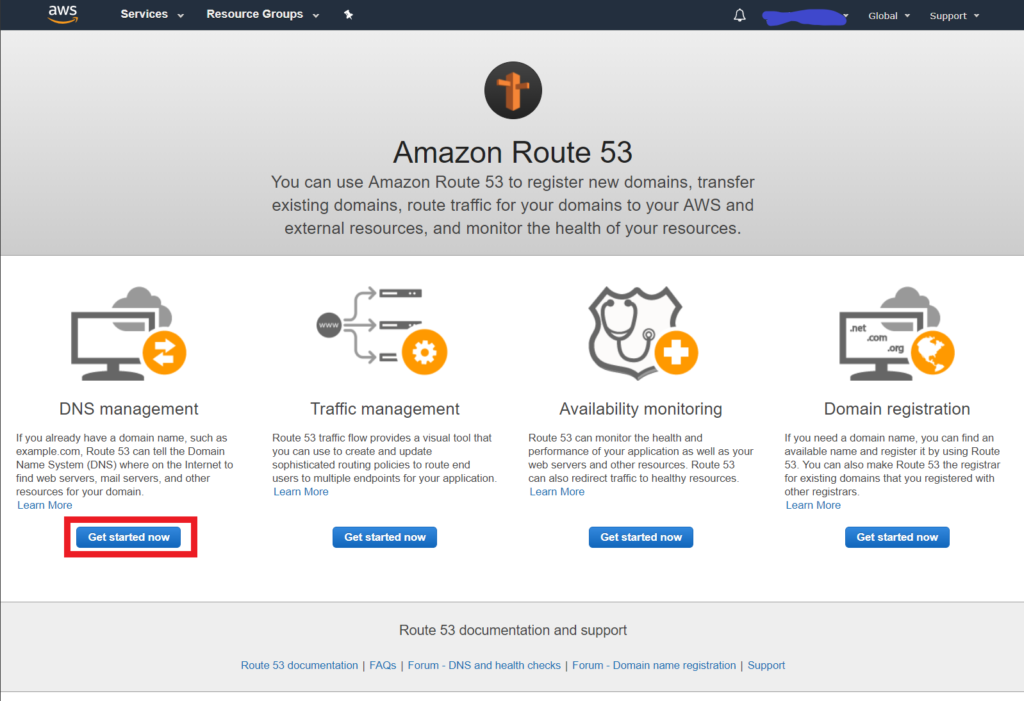
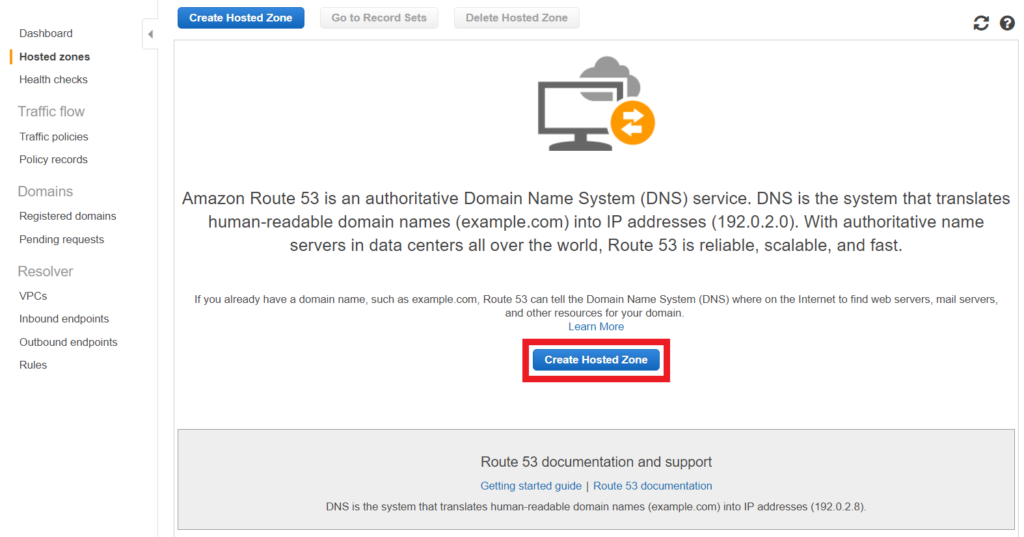
To use GoDaddy Domains with Amazon Web Services (AWS) products such as Elastic Load Balancers, CloudFront, API Gateway, etc., you will need to associate your domain with AWS Route 53 DNS.
Follow the step-by-step tutorial below on how to associate your GoDaddy Domain to Amazon Route 53.
For the purpose of demonstration, I will be using my sample domain name – chargedneutron.com.
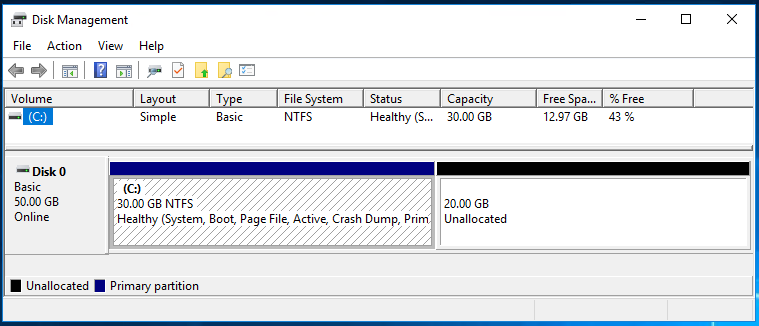
Problem: You are running a critical Windows Server on AWS EC2 and the C: drive is almost full (storage volume) but it should zero downtime (No Restart, No Stop then Start). Is this possible on AWS EC2?