I have always used Synergy when using multiple computers since I do not want to use a lot of hardware (mouse and keyboard) to control all my unit. When I first received a Raspberry Pi the first thing I did was make Synergy work.
Here is the configuration that I use when working with Raspberry Pi.
- Client – Raspberry Pi (to be controlled)
- Server – Laptop where the mouse and keyboard will be used (Windows/Mac)
1. Installing Synergy on Raspbian
Open the terminal and run the code below.
sudo apt-get install synergy
This will install Synergy on the Raspberry Pi along with its dependencies.
2. Try connecting Synergy Server
Get the IP Address of the Synergy Server then run the command below on your Raspberry Pi.
synergyc IP_Address
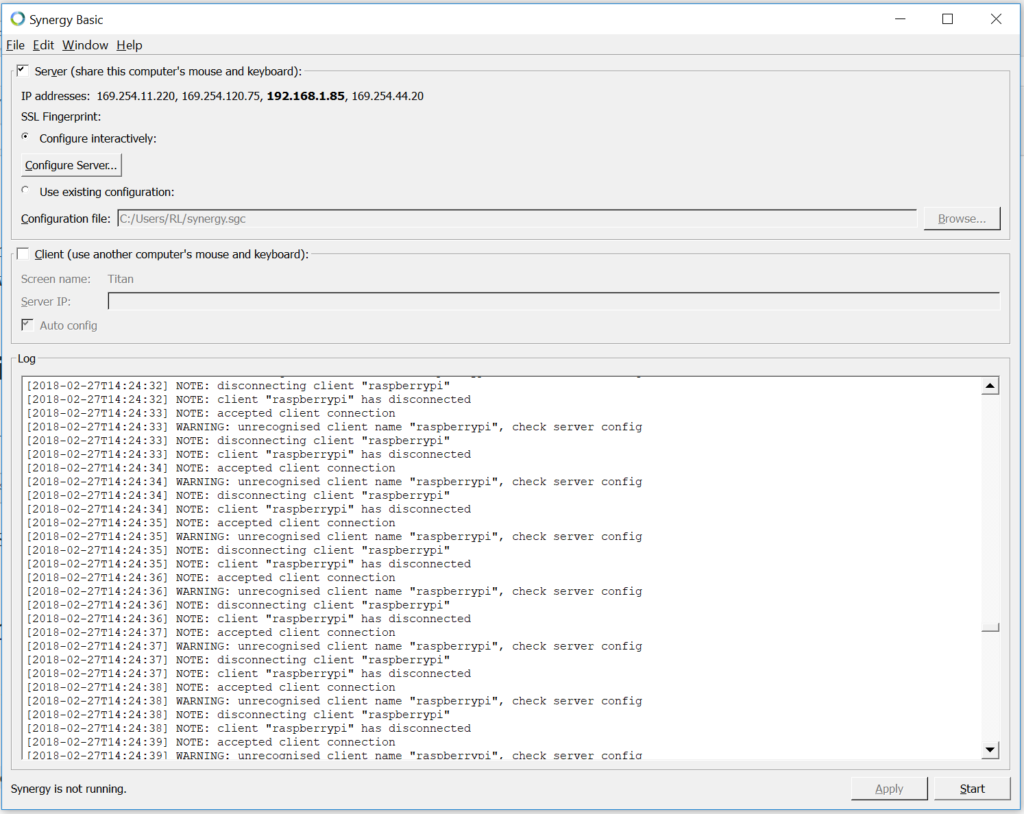
In my case the IP Address of my computer is 192.168.1.85.
synergyc 192.168.1.85
Note: synergyc is short for Synergy Client.
On the Server the logs would then move and show that the Raspberry Pi is connecting but is not able to connect as the server does not recognize raspberrypi (hostname of the raspberrypi).

Which brings us to our next step.
3. Configuring Synergy Server to accept Raspberry Pi as Client
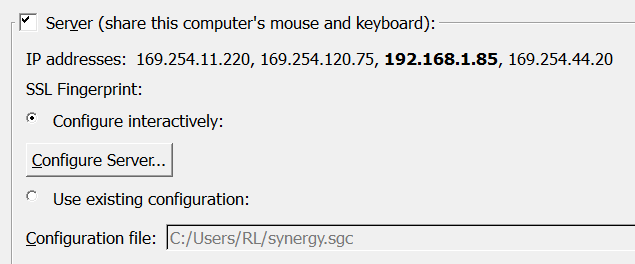
On your Windows or Mac computer running Synergy. Check Server then click on Configure Server...
Then on the Server Configuration Window drag the computer icon on the upper right to Grid. Place it where you want have your Raspberry Pi.
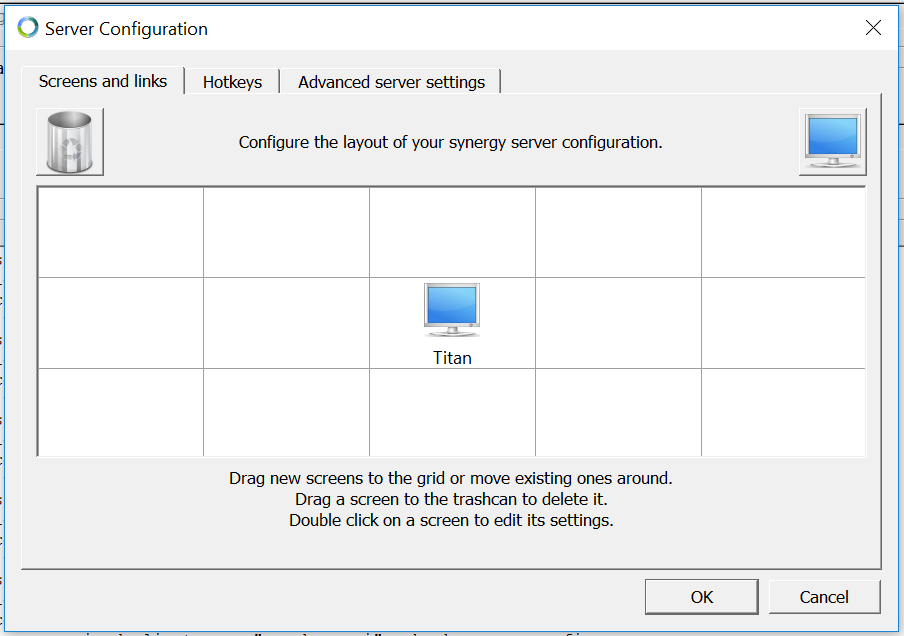
For me I would like to add it on the right of my Server (named Titan).
Initially it would be named Unnamed. Double click on it and change the name to raspberrypi.
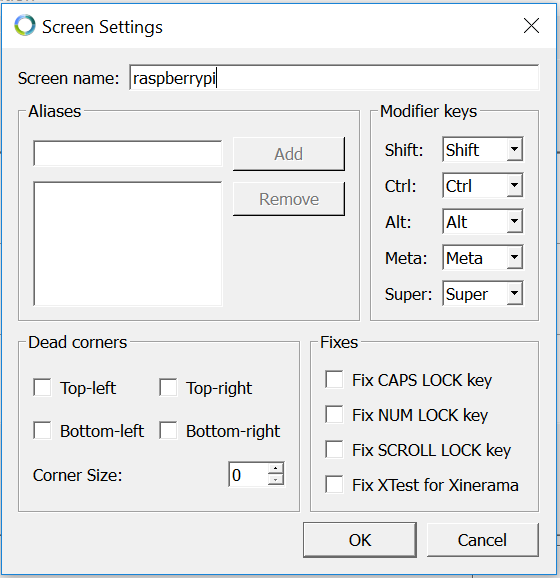
Click OK on the Screen Setting Window.
Click OK on the Server Configuration Window.
Then click Apply on the Synergy Window.

Once that is done you will now be able to use your Windows’/Mac’s mouse and keyboard to control the Raspberry Pi.
Note: The active screen is where your mouse is.
Autostart your Synergy Client
Run the following commands on your Raspberry Pi’s terminal.
cd ~/.config/autostart/
leafpad synergy.desktop
Type and save the following on the leafpad text editor.
[Desktop Entry]
Type=application
Name=Synergy Client
Exec=synergyc IP_ADDRESS
On my screen this is what it looks like.
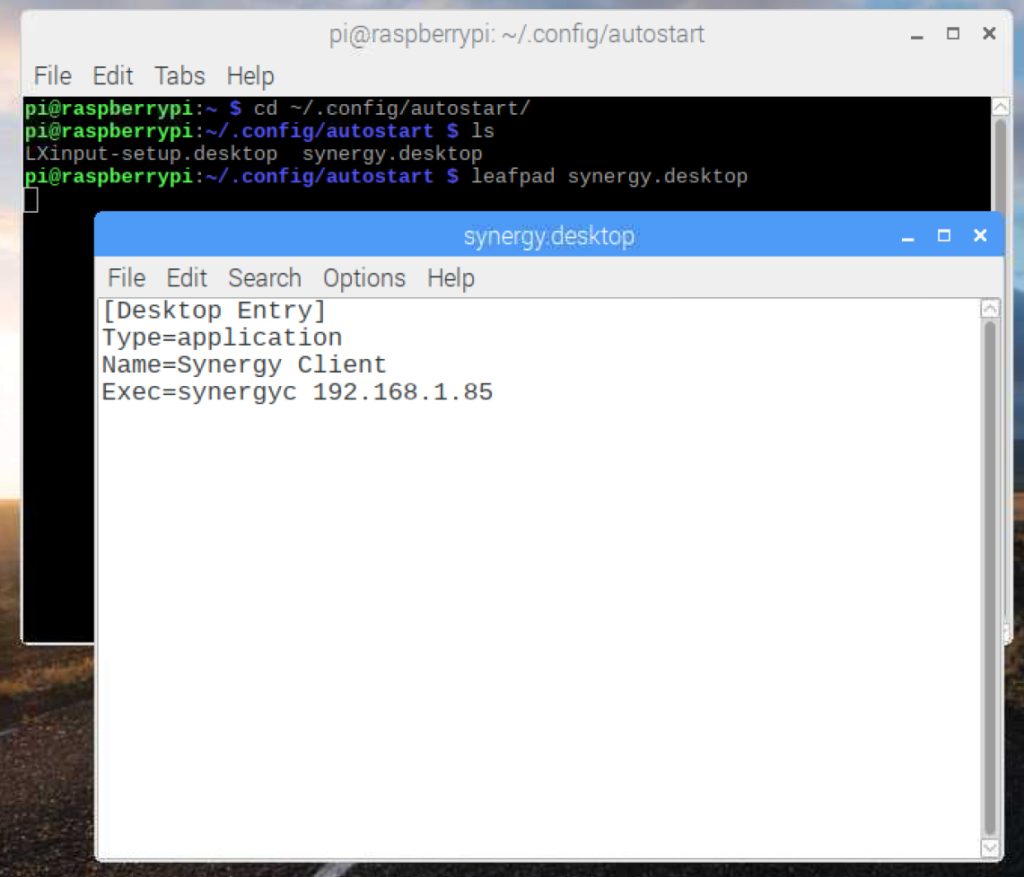
Save then exit.
Once that is done every time you restart or power on your Raspberry Pi the Synergy will run automatically as Client and connect to the specified IP Address you set.

???
doesnt work on newer Pies..Pi.4+ etc specialy 64bit Arms.
it isnt in any repository for rasp os or any Arm8 OS that i can find
apt install synergy just gives “not found” error
Very helpful. Works well on my Rapiberry and windows.