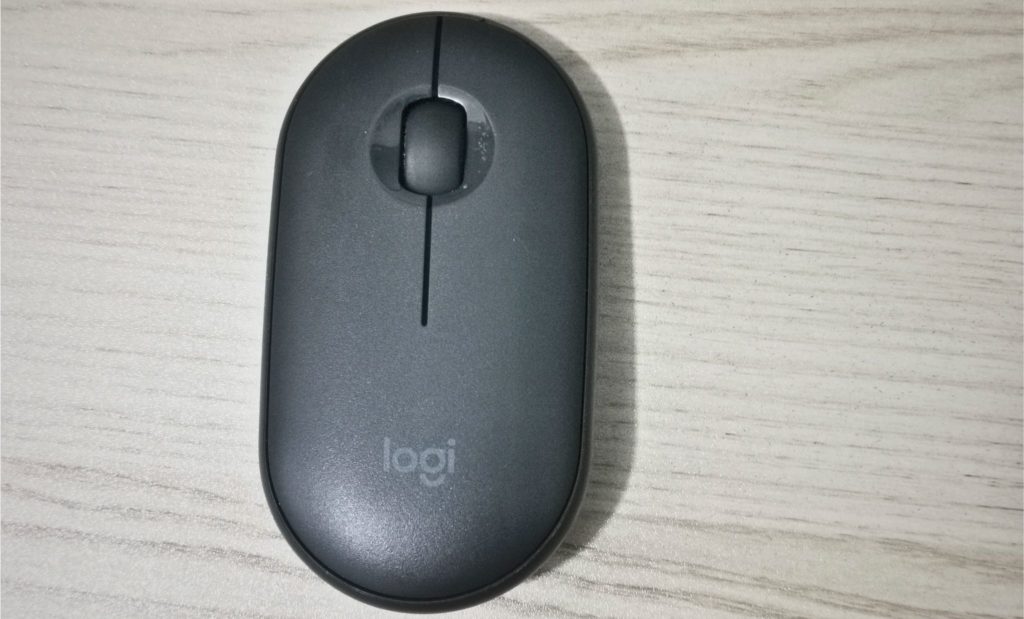
The Logitech M350 Pebble is so far the best mouse that I have used, and I have used a lot of mouse in my 30 years of existence.
I like it because it is wireless, lightweight, quiet, responds well and does not have ribs in the scroll bar. I can use the mouse the whole day without my hands or fingers getting numb.
Also, it has been a year since I bought the mouse and I have not even changed the battery yet.
When I first bought the Logitech M350 Pebble I got confused because it says that it has Bluetooth connection. But when I saw the wireless USB dongle, I thought I got tricked. As it turns out this mouse has both – a (1) wireless USB dongle mode and a (2) Bluetooth mode.
The nice thing about the Logitech Pebble mouse is that you can switch between the 2 modes with a press of a button underneath the mouse.
Below are instructions on how you can connect the Logitech M350 Pebble mouse to Windows 11 using the wireless USB dongle and using Bluetooth.
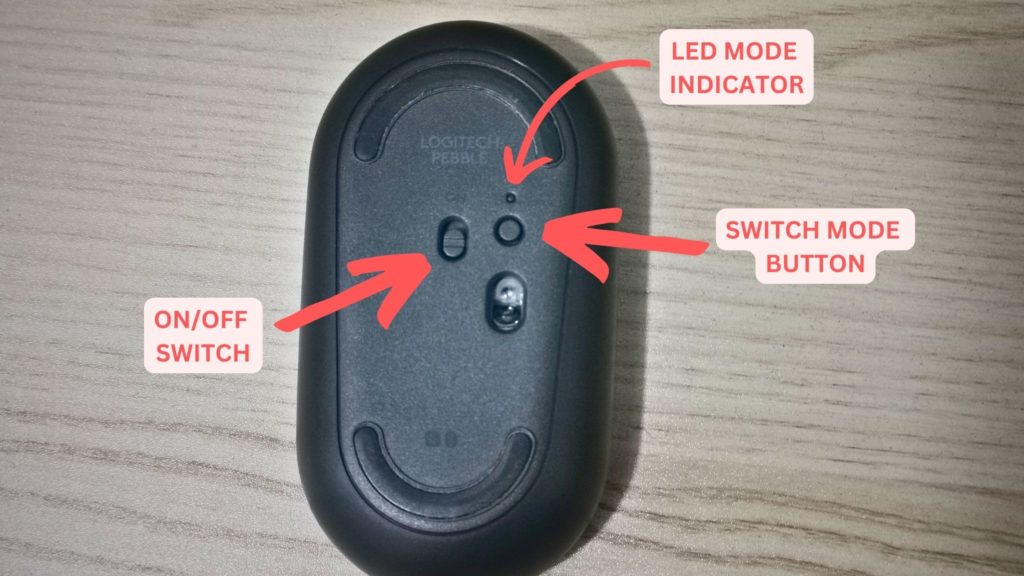
Make sure the Logitech mouse is turned On
Before following the instructions below make sure that the Logitech Pebble is turned on by moving the On/Off Switch to the ON position.
The LED Mode Indicator will blink to show that the mouse is turned on.
Connect Logitech M350 Pebble using the Wireless USB Dongle
The easiest and fastest way to connect the Logitech Pebble is to use the Wireless USB Dongle since you do not have to configure anything in Windows 11 Settings.
To connect the Logitech M350 Pebble to Windows 11 using the Wireless USB Dongle follow the instructions below.
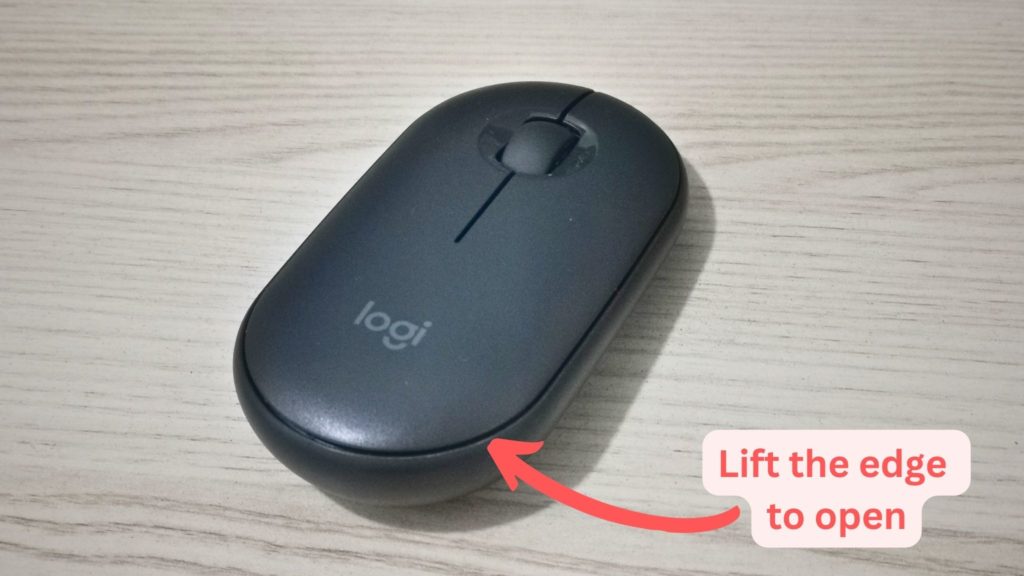
#1
Remove the top covering of the mouse by lifting the edge.
Note: Compared to other mouse, it is actually easy to lift the cover since magnets attach it.
#2
Pull out the Wireless USB Dongle located near the battery.
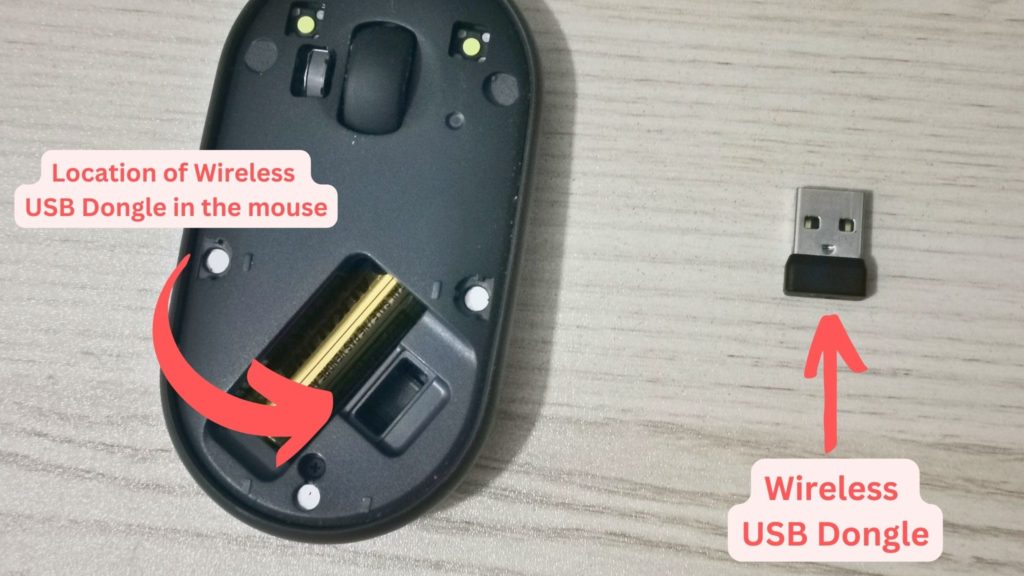
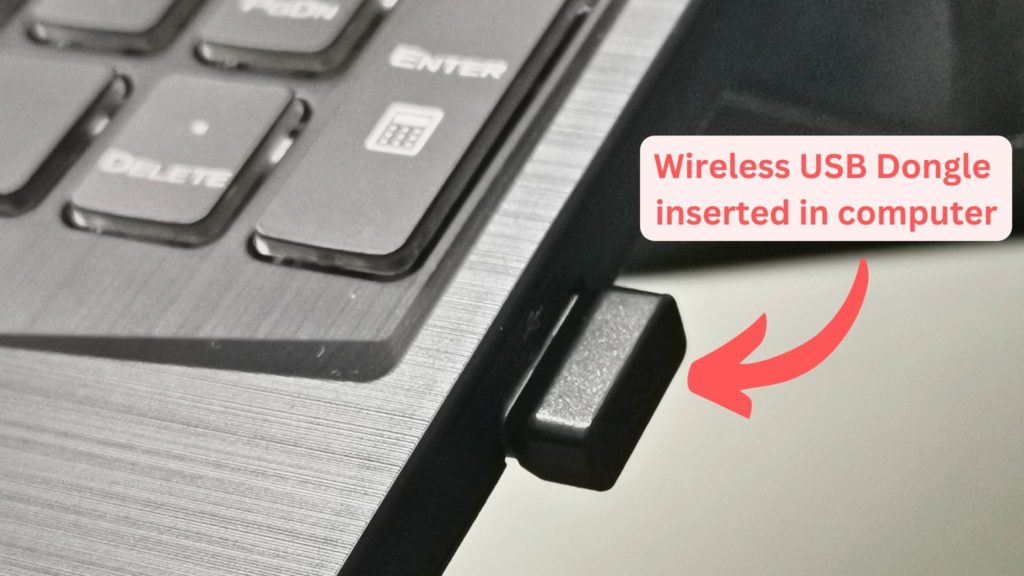
#3
Connect the Wireless USB Dongle to your Desktop or Laptop via a USB Port.
Note: The Wireless USB Dongle is a USB Type-A. You might need to provide an adaptor if you do not have USB Type-A ports.
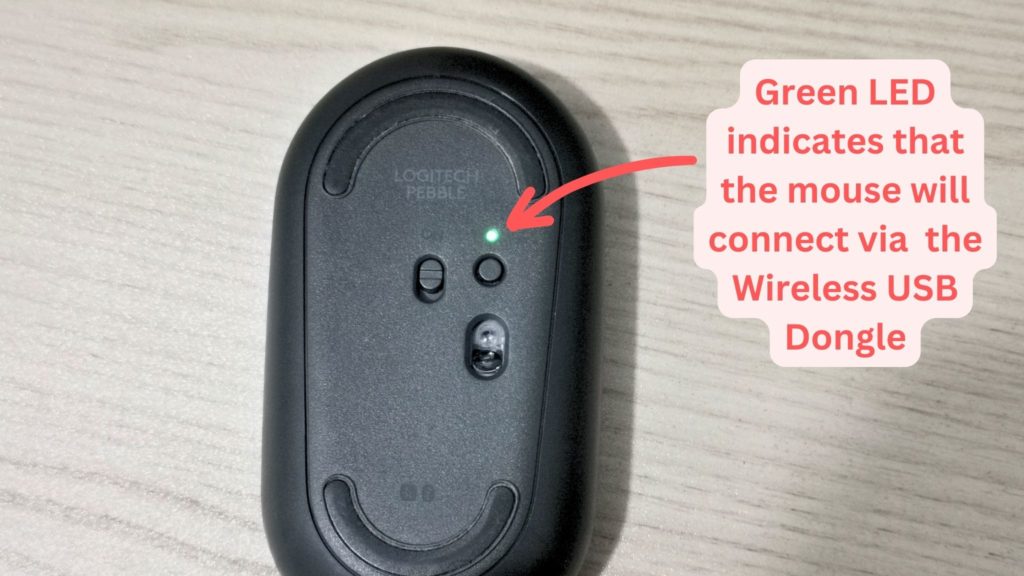
#4
On the bottom of the Logitech M350, press the switch button until the LED Indicator becomes color green.
The green LED shows that the Logitech Pebble will use the Wireless USB Dongle.
You can now use the Logitech Pebble mouse just like a regular mouse.
Connect Logitech M350 Pebble using Bluetooth
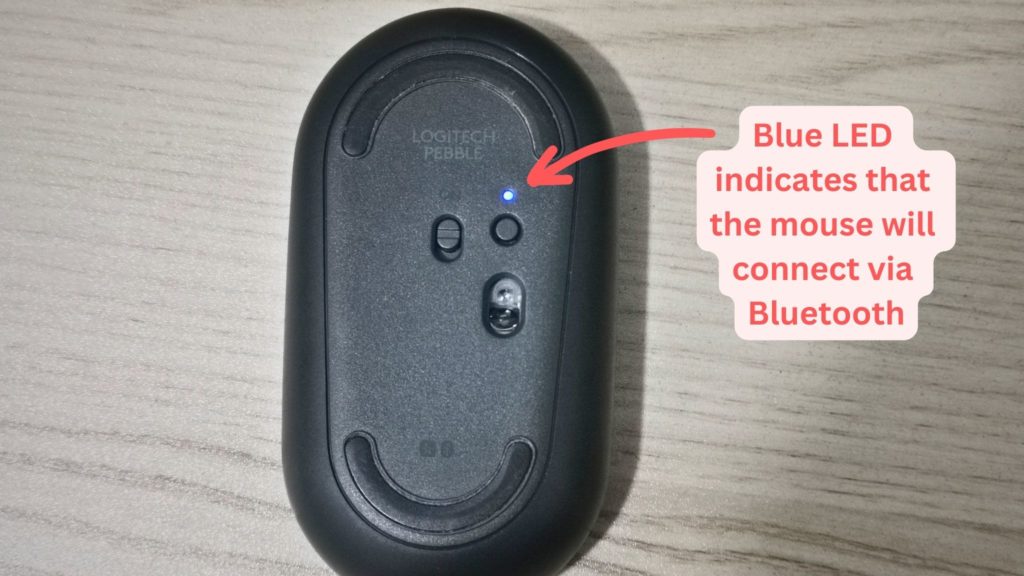
#1
Press the mode button underneath the Logitech Pebble Mouse until the indicator LED becomes a blinking blue light.
A blue LED indicator means that the mouse is in Bluetooth mode.
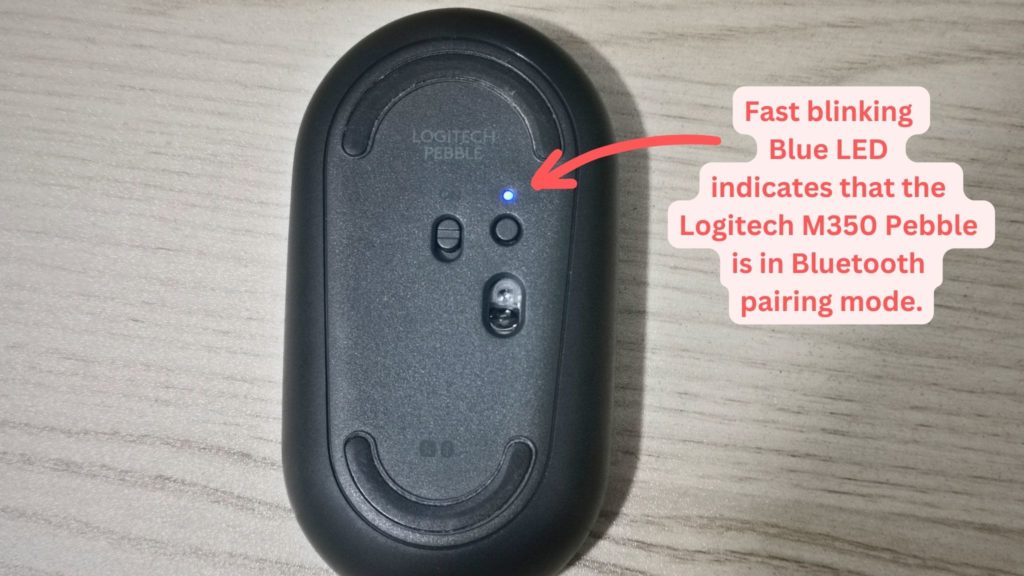
#2
Press and hold for 3 seconds the mode button. This will make the blue LED indicator to blink faster. This indicates that the Logitech M350 Pebble is now in Bluetooth pairing mode.
#3
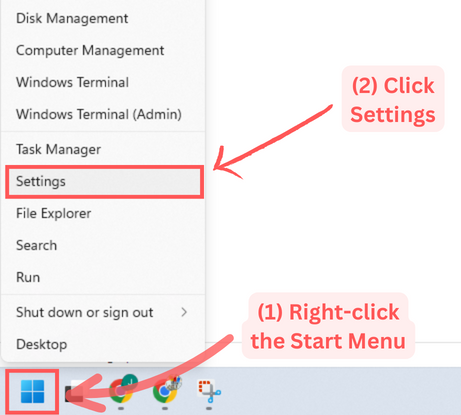
In your Windows 11 computer right-click the Start Menu, then click Settings.
#4
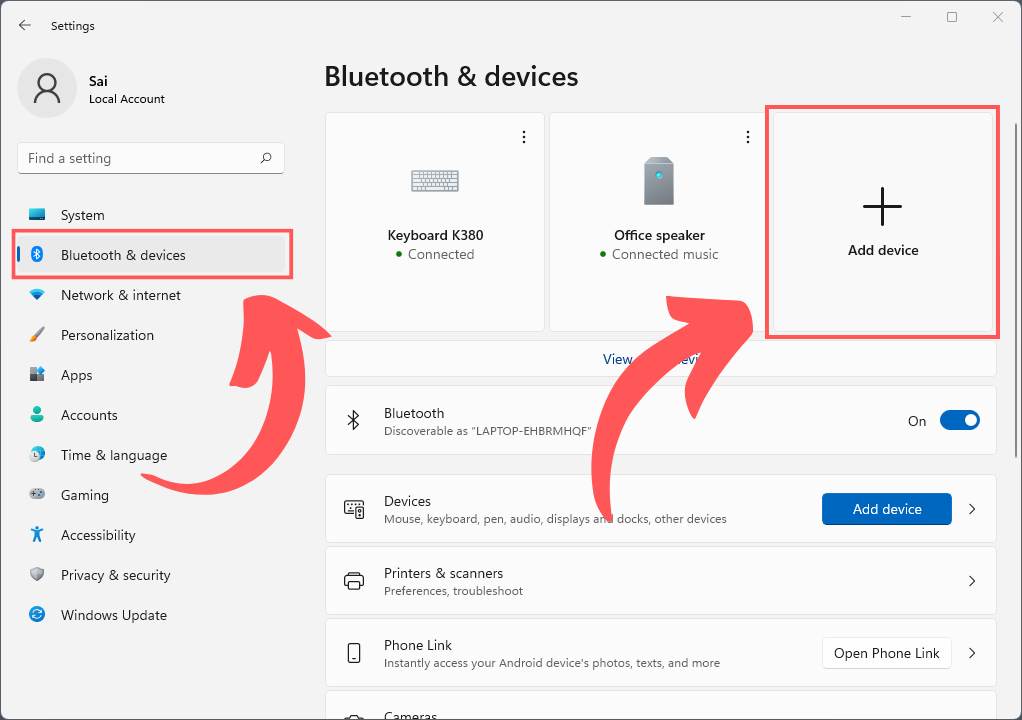
In the Settings Window, click Bluetooth & devices on the left sidebar. Then click Add device.
#5
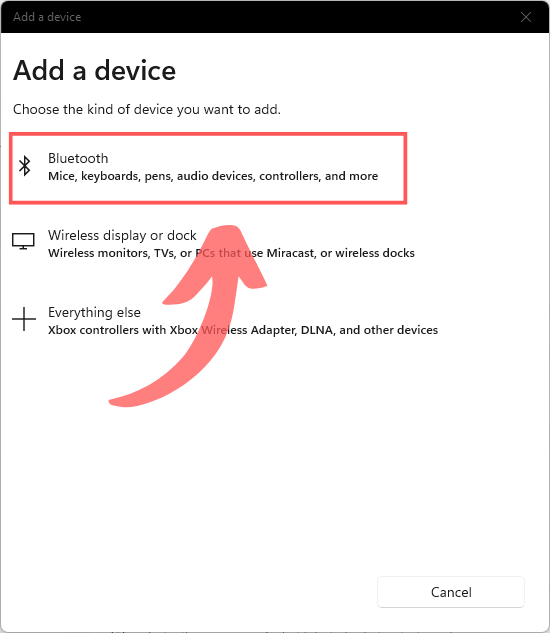
Click Bluetooth.
#6
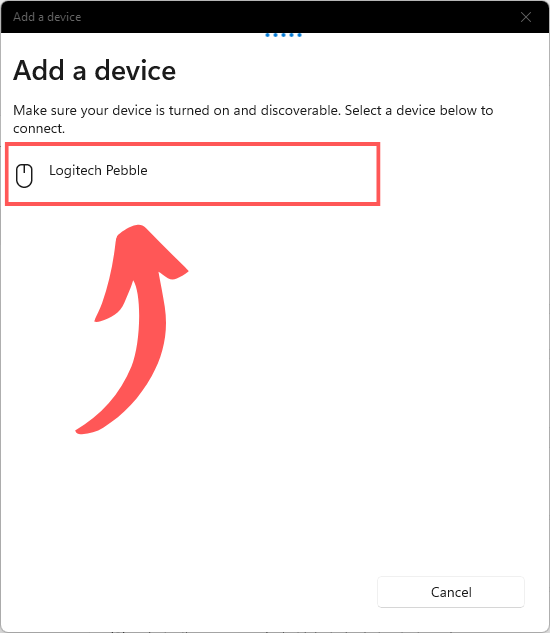
Wait until the Logitech Pebble appears in the list of devices. Click on Logitech Pebble.
Note: If your Logitech M350 Pebble did not show in the list of devices, turn off Logitech M350 Pebble and turn on pairing mode again (Step #2).
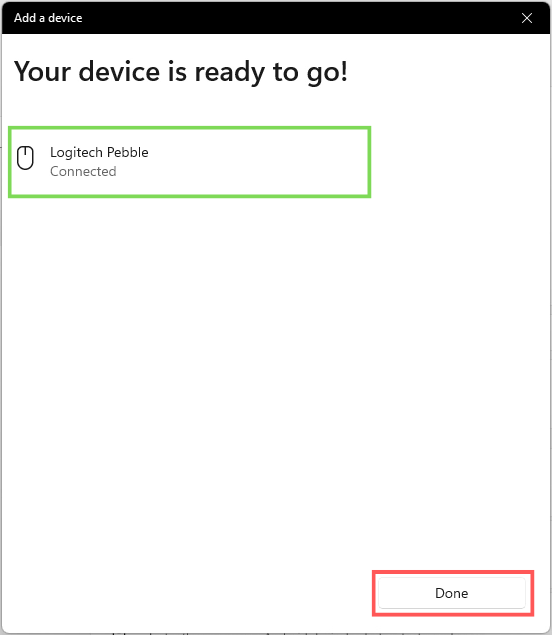
#7
Once Windows has successfully paired with your Logitech mouse then it will show Connected.
Click Done.
With that you have successfully connected your Logitech M350 Pebble mouse via Bluetooth to Windows 11.
Notes on different connection modes of Logitech M350 Pebble
The advantage of using the Wireless USB Dongle is that it is the fastest way to connect the Logitech M350 mouse to Windows. The disadvantage is that the USB Dongle sticks out of my laptop chassis, this might get hit when I am moving and may damage the dongle or the laptop.
Another disadvantage of the USB Dongle is that I sometimes forget that it is attached to my laptop 1, when I am in a hurry and bring laptop 2.
The advantage of using a Bluetooth connection is that I do not have any additional hardware sticking out of my laptop. The disadvantage is that it takes a few seconds for it to connect on startup or sometimes it does not connect at all, but turning off and on the mouse will solve this issue. It also takes time to setup the Bluetooth pairing, but once it has been set then the mouse will automatically connect to your Windows 11 computer.
I use the mouse in 2 different computers and switch between them with a single press of the button underneath the mouse.
I hope the above step-by-step tutorial helped you connect the Logitech M350 Pebble to your Windows laptop or desktop.
Let me know your experience in the comments below.
Hello
I would like you to send me your pricing, also I would like to discuss cooperation, please contact me on Whatsapp: +1 753 438 0862