I will be transferring a lot of files to my Windows Server and File Transfer Protocol (FTP) would be a great way to do this.
Below is a step-by-step instruction on how you can install and configure FTP via Windows Internet Information Services (IIS).
By the way, I have tried the instructions below on Windows Server 2012, Windows Server 2016 and Windows Server 2019.
Setup
Testing
Installation of IIS FTP
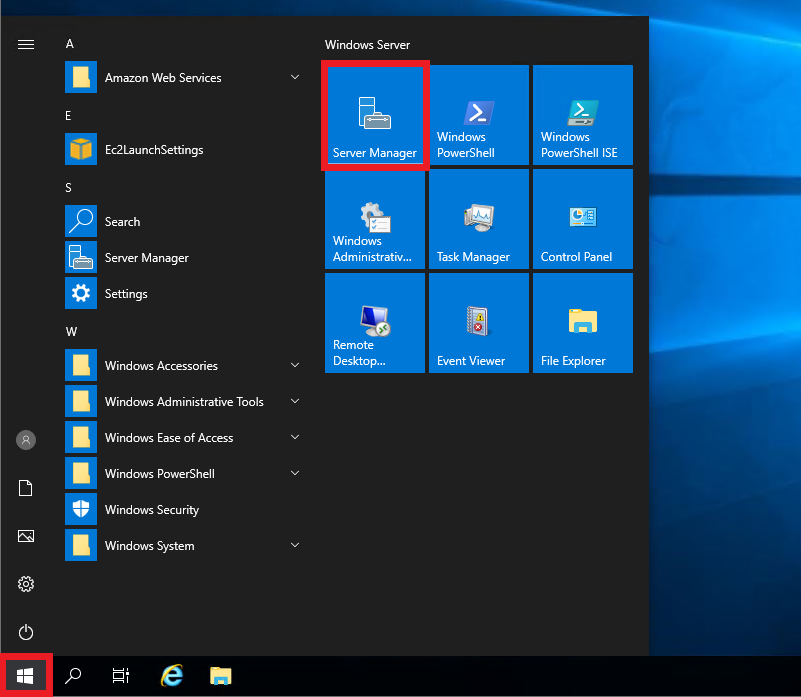
1. On Windows Server open Server Manager.
Click on Start Button on the taskbar, then click Server Manager.
Start Button is the window icon on the bottom left of the screen.
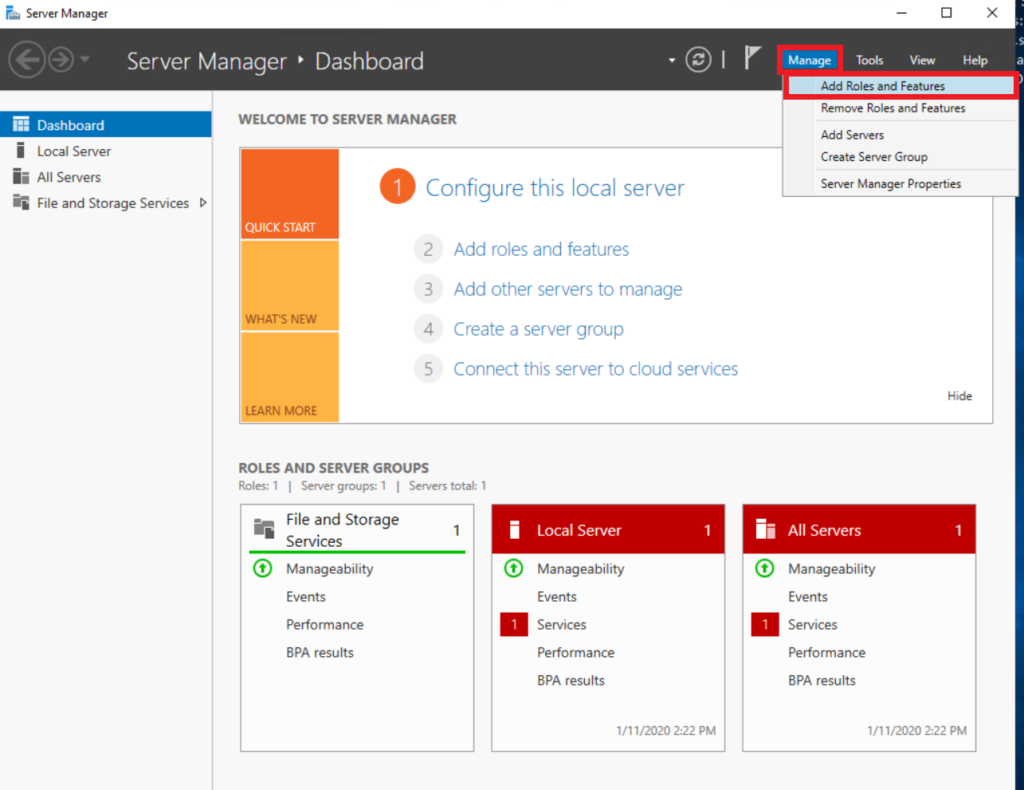
2. On Server Manager window, click on Manage then Add Roles and Features.
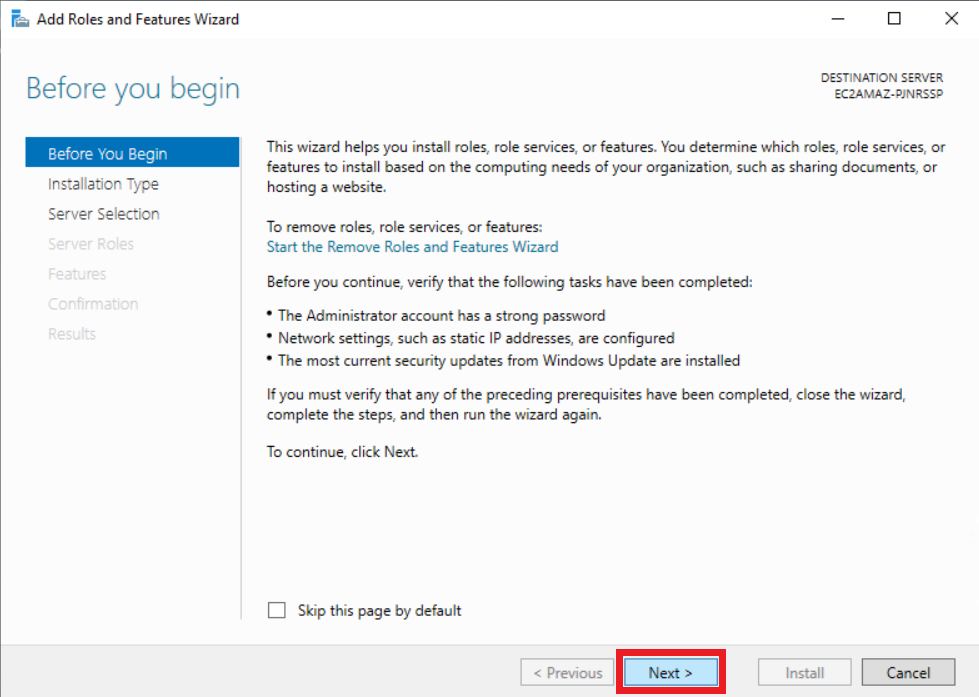
3. On Add Roles and Features Wizard window, click on Next.
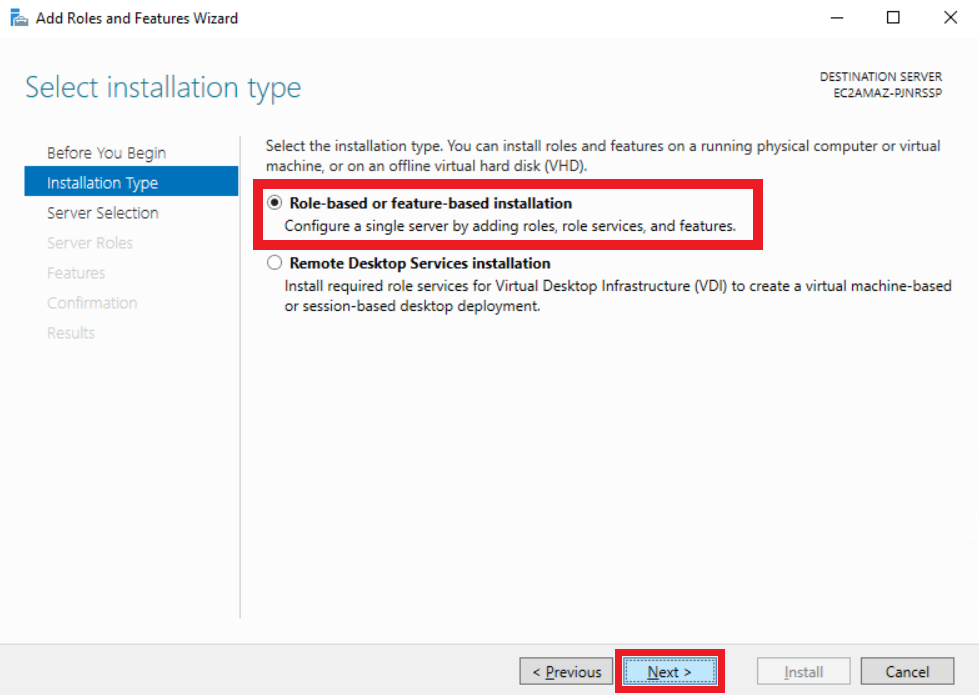
4. Make sure the radio button of Role-based or feature-based installation is selected. Click Next.
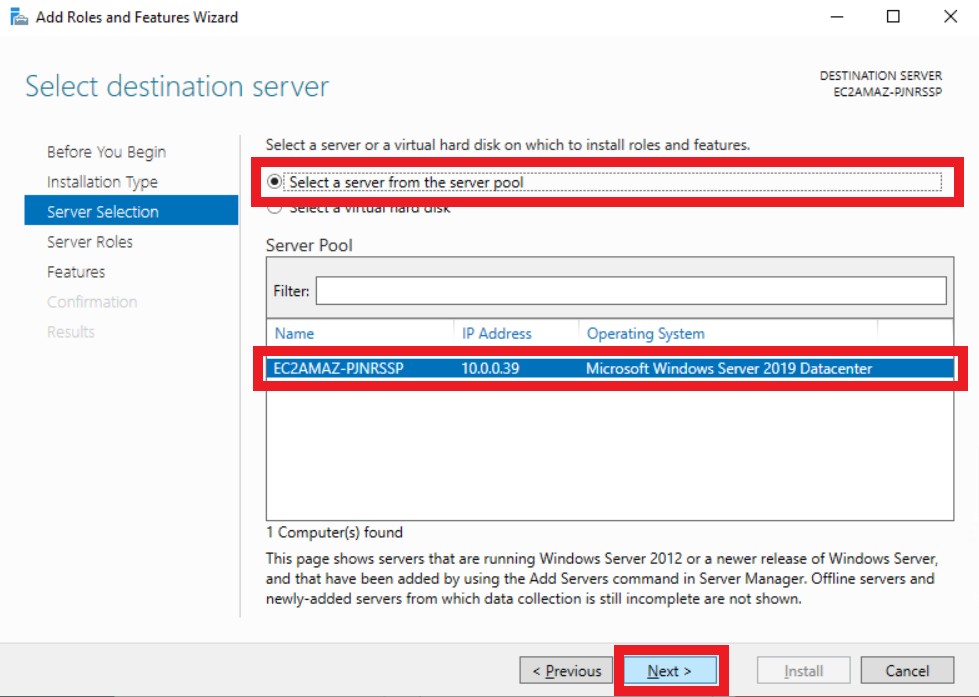
5. Make sure that your server is selected on Server Pool. Then click Next.
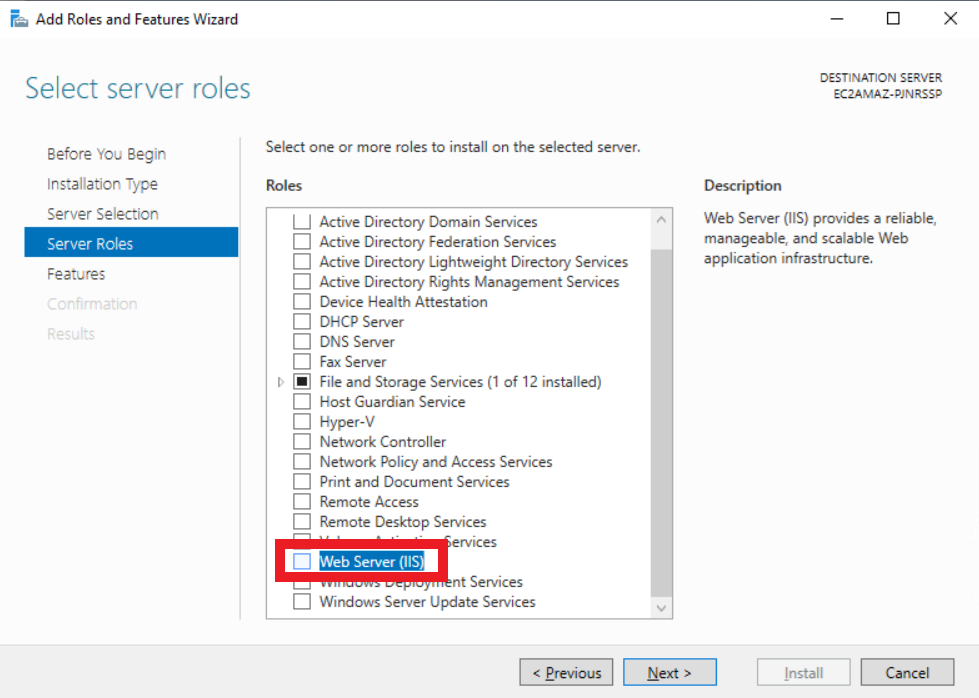
6. On the selectable Roles click on Web Server (IIS). A pop-up window will open.
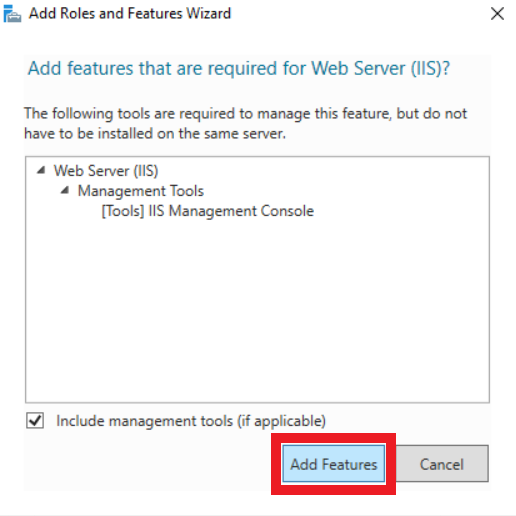
7. Click on Add Features. This will close the window and go back to the original window.
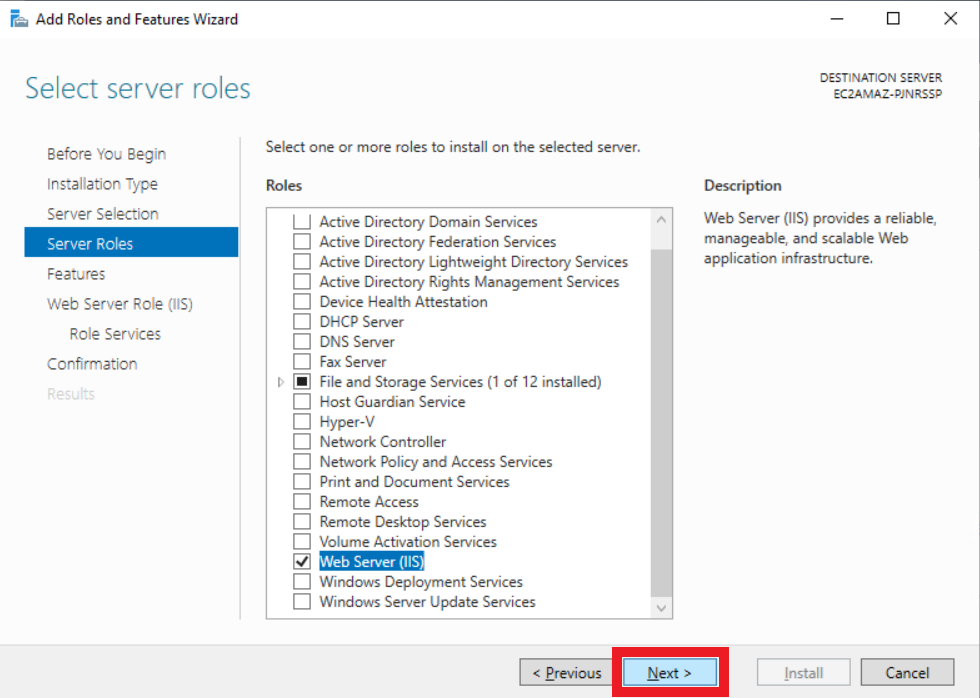
8. Click Next.
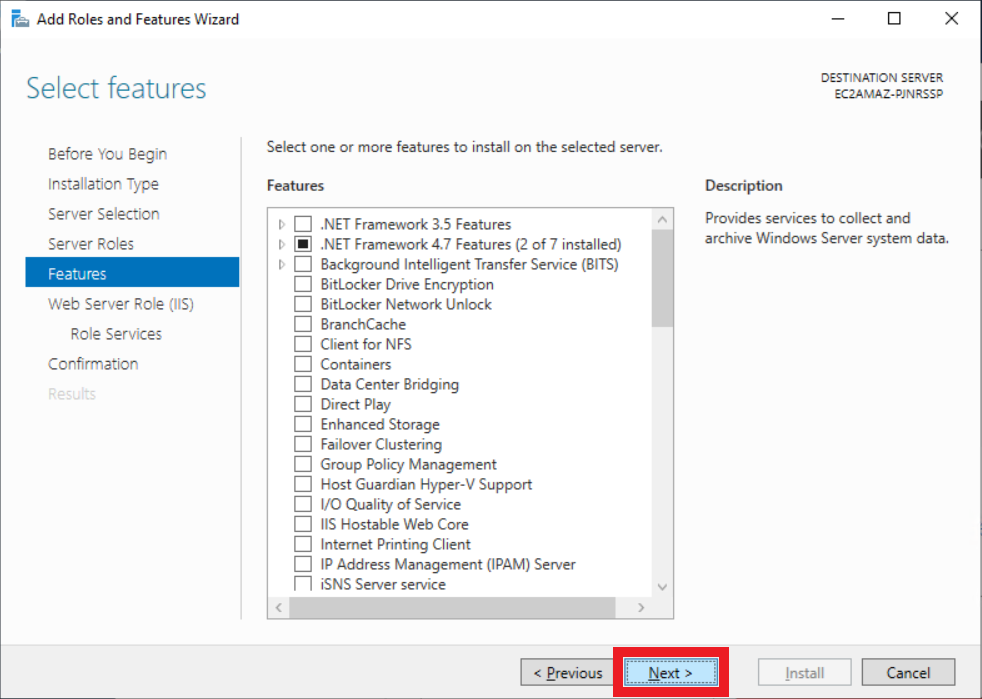
9. On Select Features, click Next.
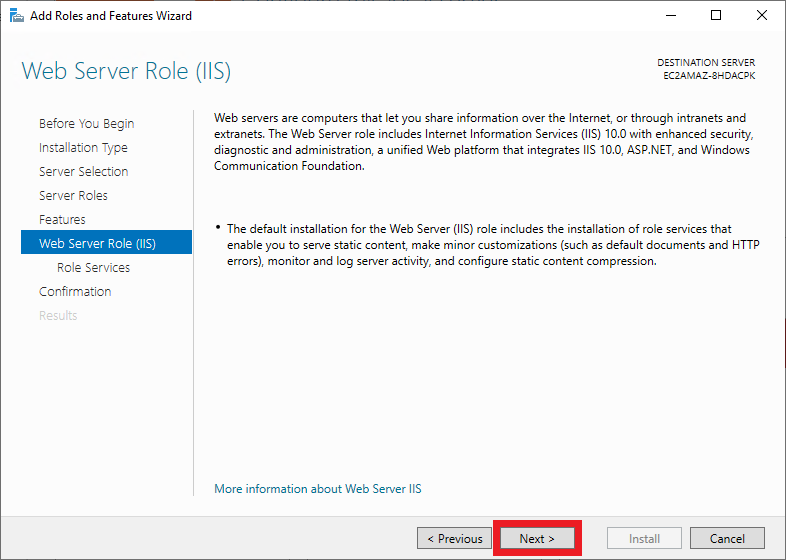
10. On Web Server Role (IIS), click Next.
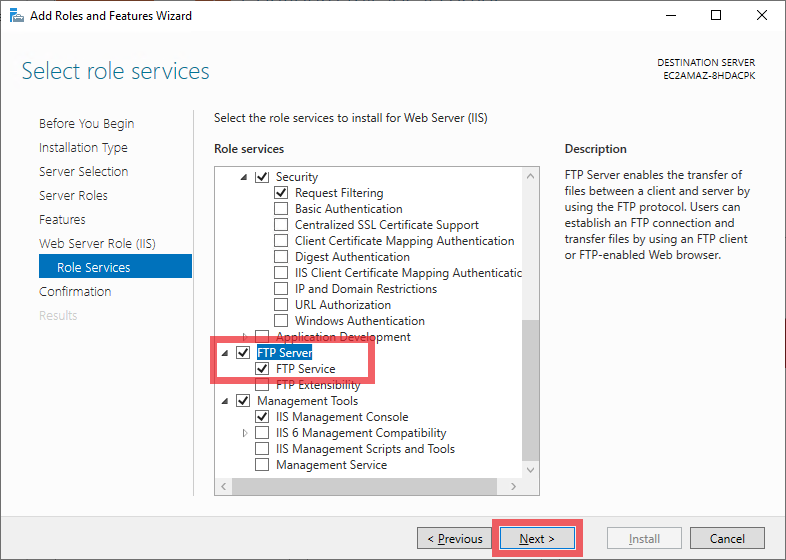
11. On Select role services, check FTP Server. This will automatically check <strong>FTP Service</strong>. Click Next.
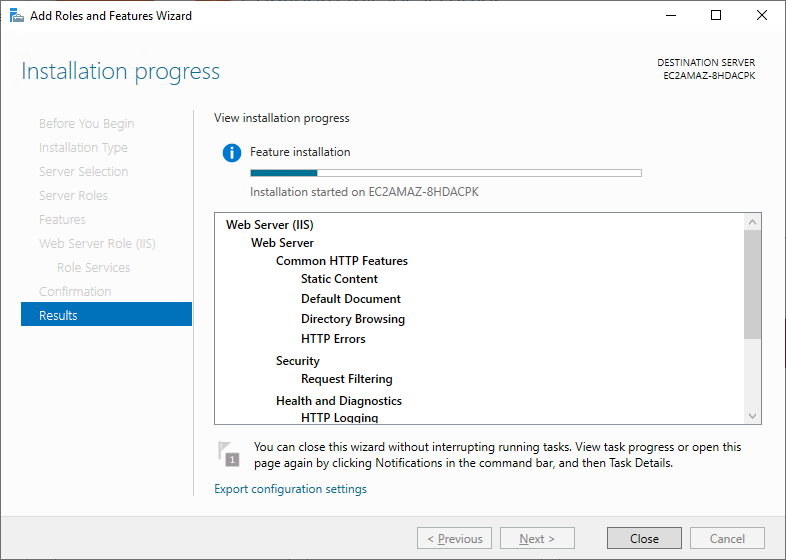
11. On Confirm installation selections, click Install.
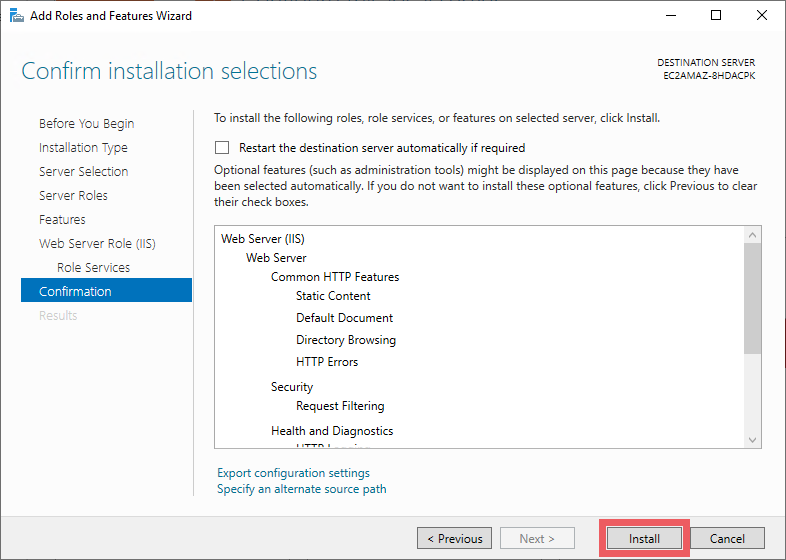
Wait for the install to finish.
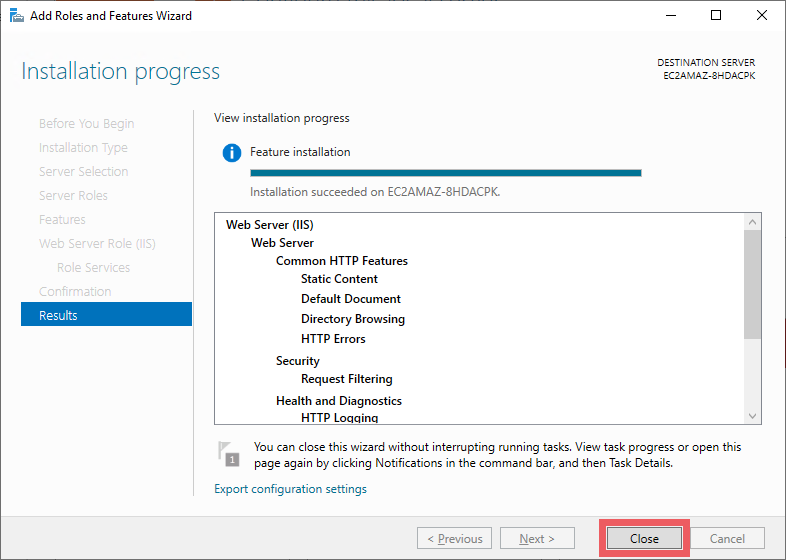
12. Once the window says that Installation succeeded, click Close.
We have finished installing IIS FTP Service on our Windows Server. But we still have to configure it.
Configuring IIS FTP Server
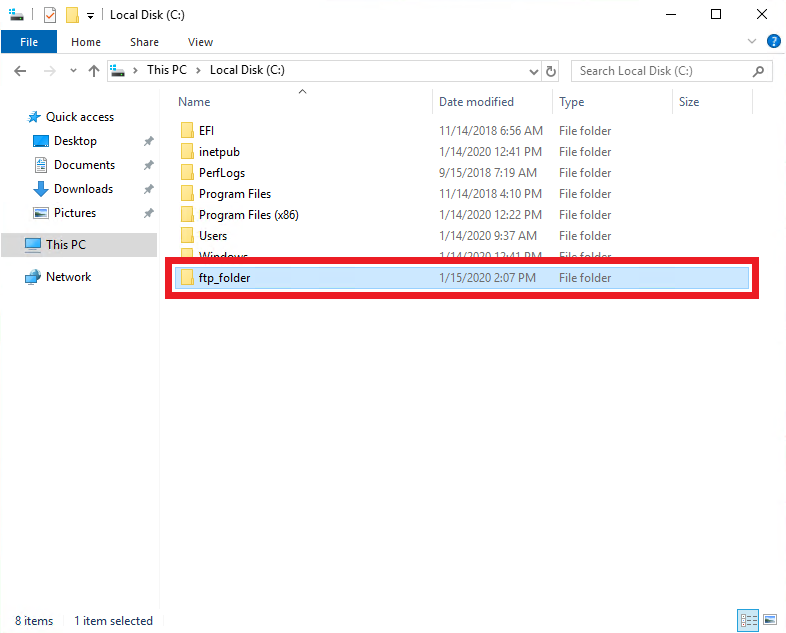
Note: We have created a folder where whenever we do FTP to the server we will be able to see the contents of that folder.
For this case we have created C:\ftp_folder.
Follow the instructions below to configure FTP Server.
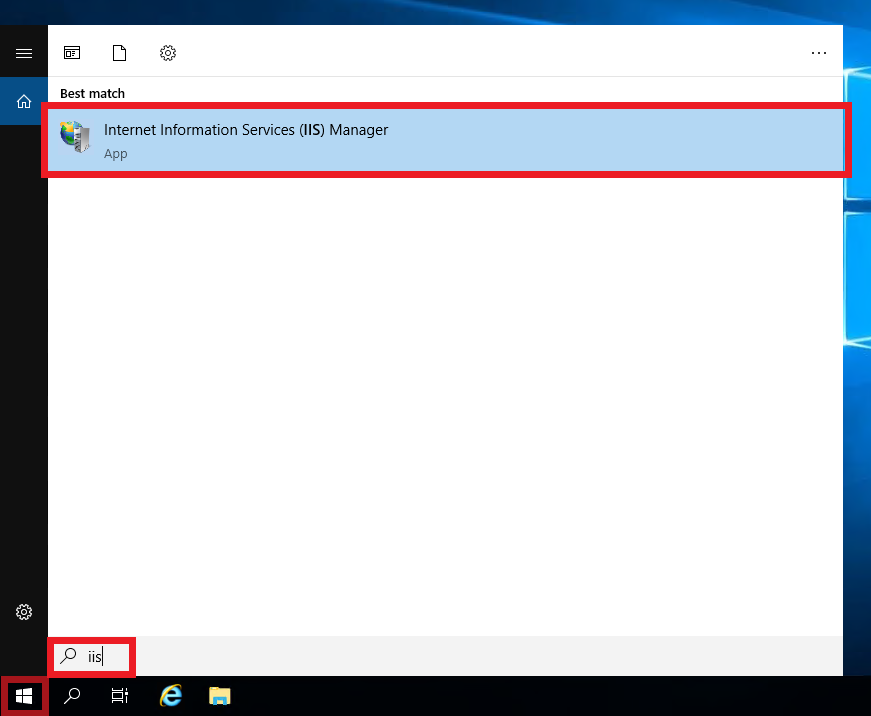
13. Open Internet Information Services (IIS) Manager.
Click on Start Button on the taskbar, then search for ‘IIS’. Click Internet Information Services (IIS) Manager from the list.
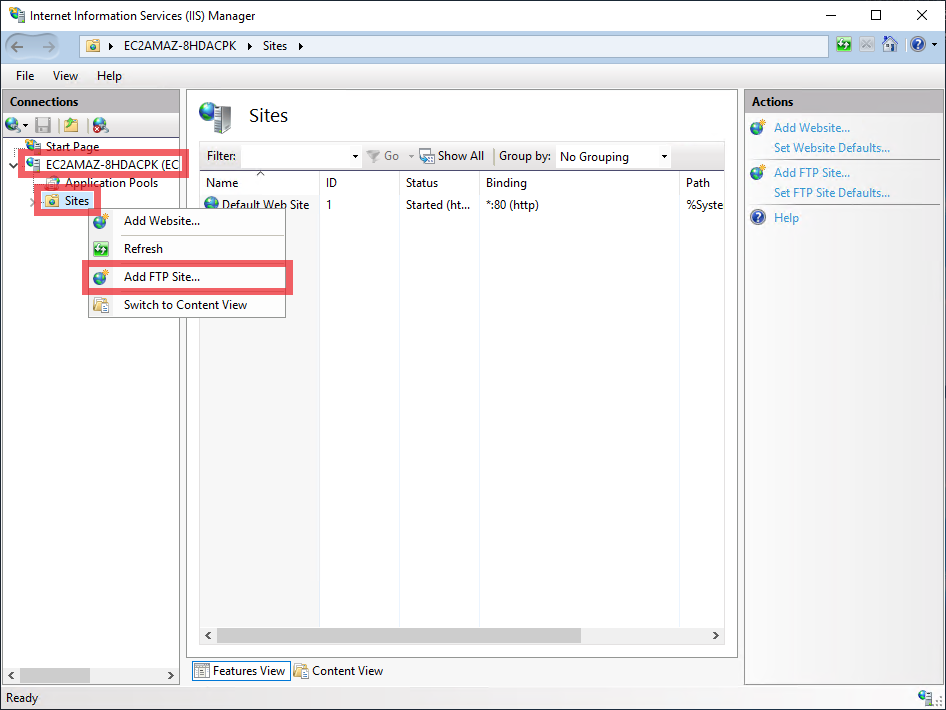
14. On the Connections left sidebar, double click on the computer name to expand the folder tree.
Right-click on Sites, then click <strong>Add FTP Site</strong>. A new window will open.
15. On the Site Information, input desired FTP site Name. Then on the Content Directory, your target directory. In my case this will be at C:\ftp_folder. Then click Next.

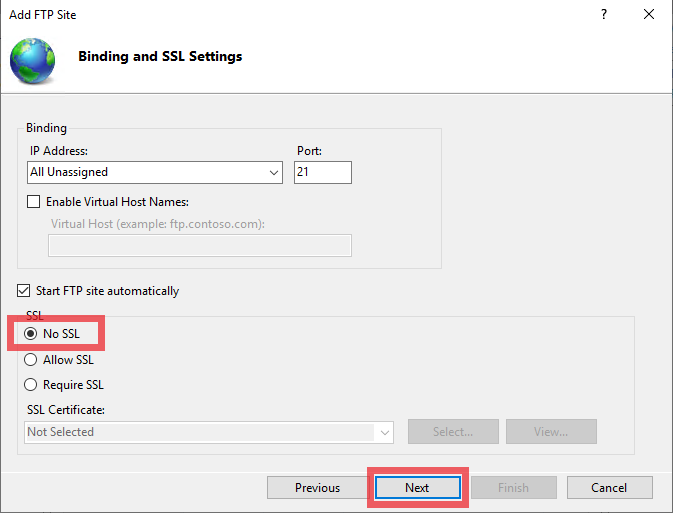
16. On Binding and SSL Settings, only change the SSL to <strong>No SSL</strong>. Then click Next.
Note: No SSL is unsecure communication. It is highly recommended to use Allow SSL or Require SSL. As not to add complications to this tutorial we will only be using No SSL. I will be creating another post for IIS FTP SSL Configuration.
Note: We are using Port 21. This will come in handy when you are debugging network firewalls.
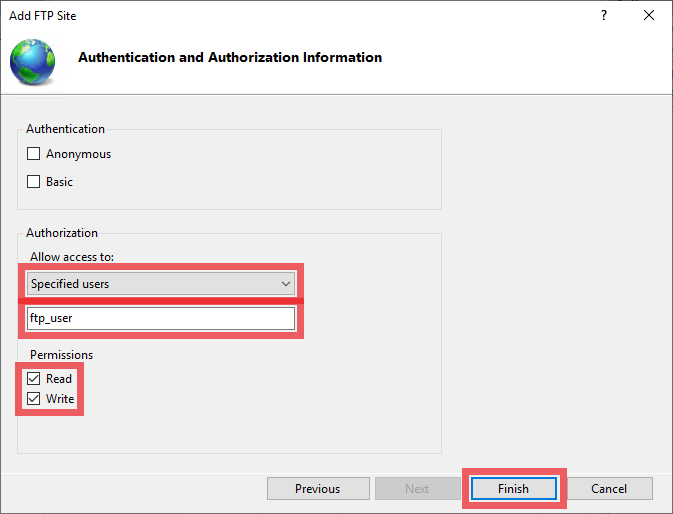
17. On Authentication and Authorization Information, click on the Allow access to dropdown and select Specified users. Enter your desired <strong>username</strong>. Note this username, we will need to create this as Windows User. In my case username is ftp_user.
On Permissions, check <strong>Read </strong>and <strong>Write</strong>.
We have now created our FTP Site.
On the IIS Manager you will see the added FTP Site.
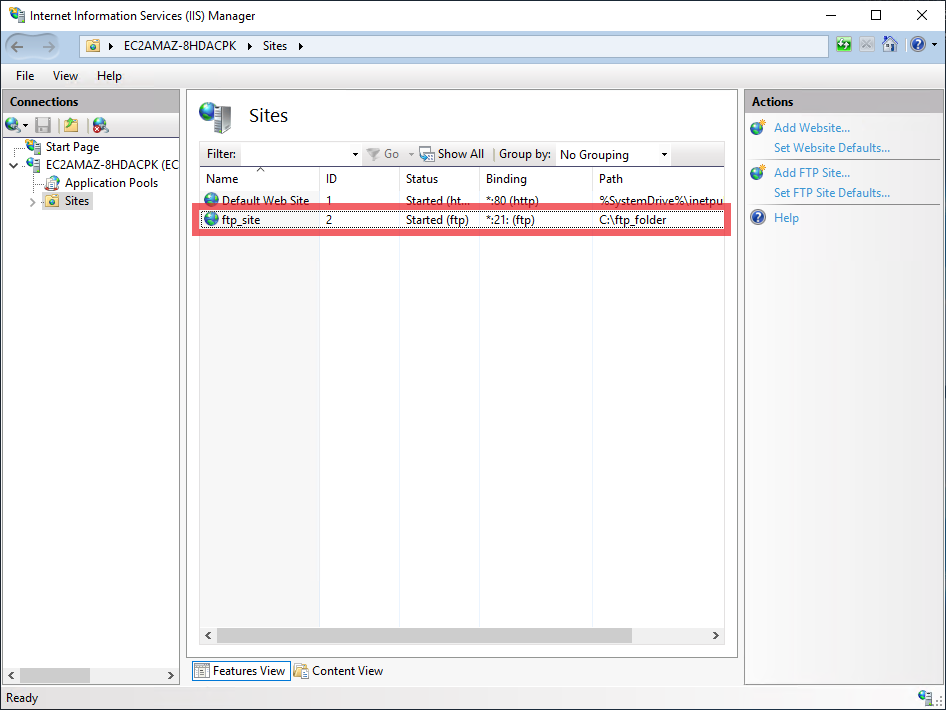
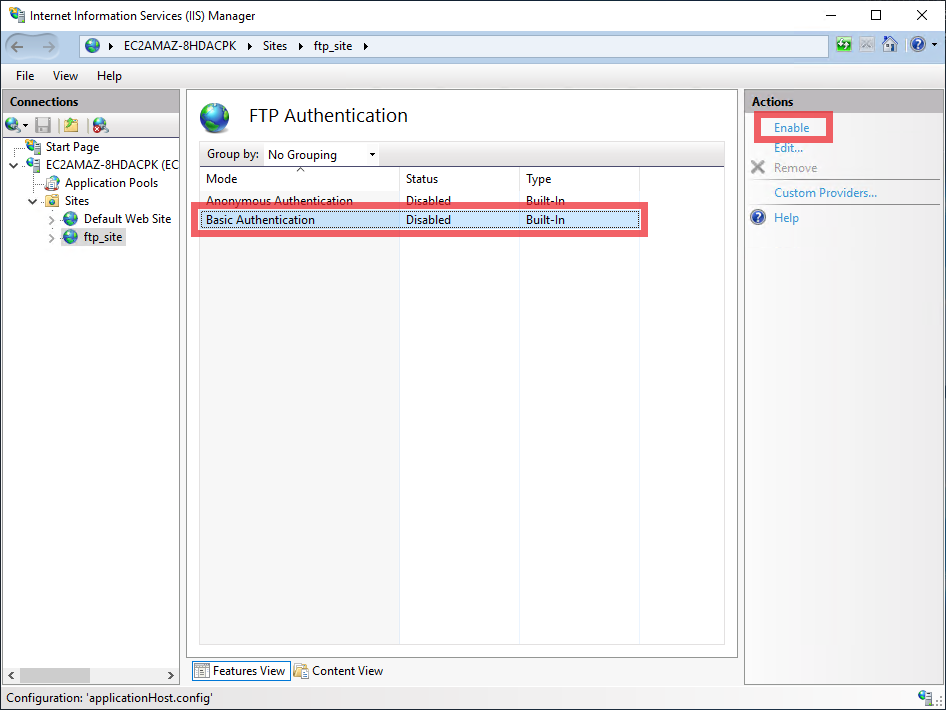
18. Double-click on the FTP Site from the screenshot above.
Then double-click FTP Authentication.

19. Click on Basic Authentication, then on the right-sidebar Actions click <strong>Enable</strong>.
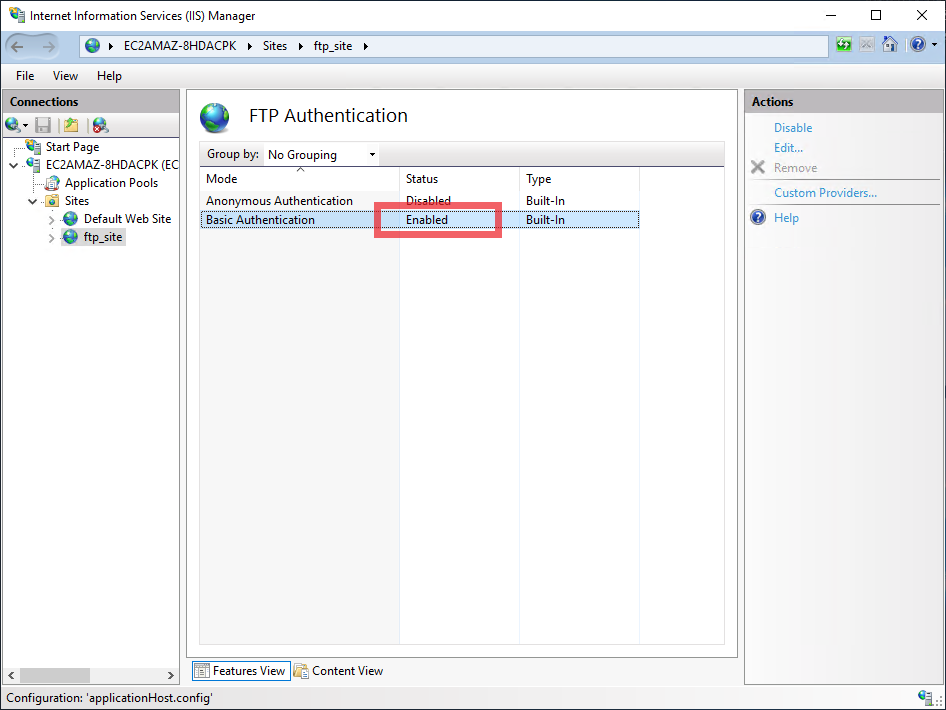
20. Verify that Basic Authentication is Enabled.
Adding Windows User for FTP Site
We still need to create the Windows User on Step #17.
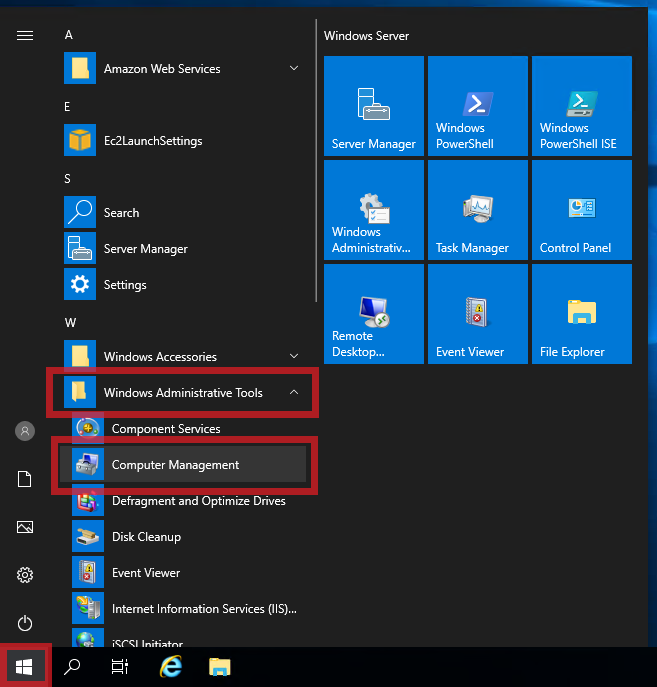
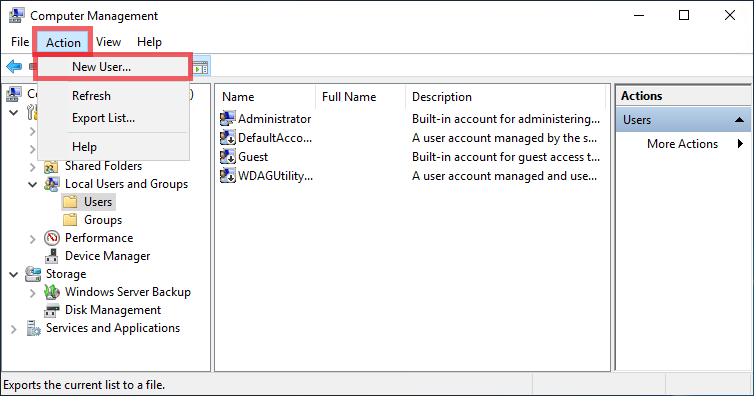
21. Click on Start Button, then Windows Administrative Tools folder then Computer Management.
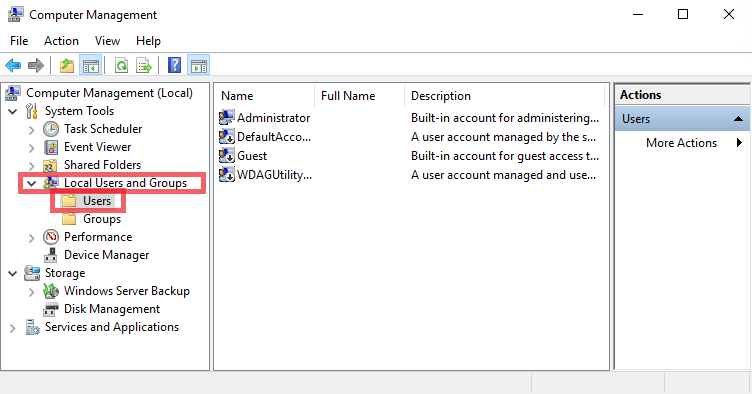
22. On the left-sidebar double-click on Local Users and Groups to expand it, then click on <strong>Users</strong>.
23. On the menu bar click on Action then New User…
A window will pop up.
On step #17, I entered the username ftp_user. That is also the username that we need to add.
24. Input the User name, password, confirm password, then add your desired settings below the password. Then click <strong>Create</strong>.
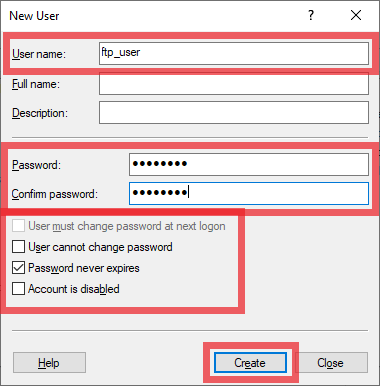
After you click Create, the form will then be blank. Do not worry, your user has been succesfully created, just click on <strong>Close</strong>.
25. Verify in the list of users that your user has been created.
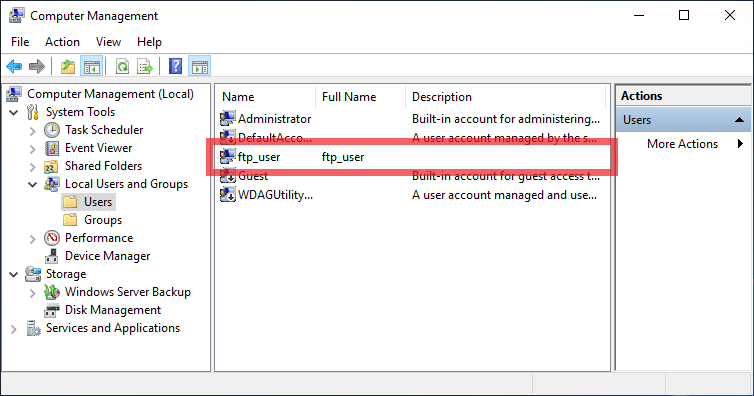
Once we see our created user, we can now do FTP to our Windows Server.
Next step is to figure out what the IP Address of our Windows Server and connecting to our Windows Server via FTP.
Getting the IP Address of Windows Server
26. Right-click on the Start Button and click <strong>Windows PowerShell</strong>.
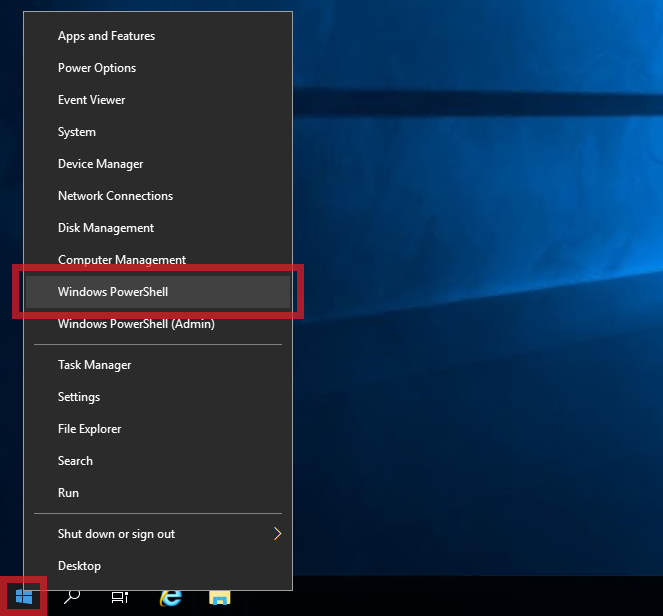
27. Type the command <strong>ipconfig</strong>, then press <strong>Enter</strong>.
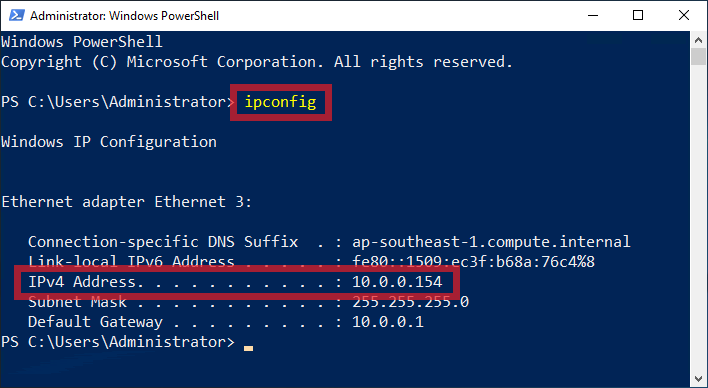
The value of IPv4 Address is your IP Address. In my case it is 10.0.0.154.
Next is to connect to our Windows Server via FTP.
FTP to Windows Server via FileZilla
28. On another computer on the network, open <strong>FileZilla</strong>.
Input the following
| Host: | IP Address of your Windows Server with FTP Mine is 10.0.0.154 |
| Username: | FTP User created on Step #17. Mine is ftp_user |
| Password: | Password you set for your FTP User. |
Then click Quickconnect.

29. A warning will pop-up saying that you are using Insecure FTP connection. Just press <strong>OK</strong>.
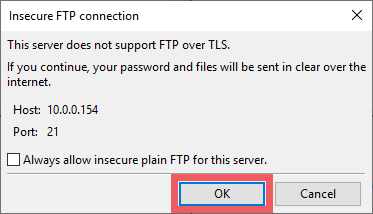
FTP without TLS is not really recommended. But for this tutorial to be less complicated I will not write about it here, but on a different post.
30. You have successfully connected via FTP.
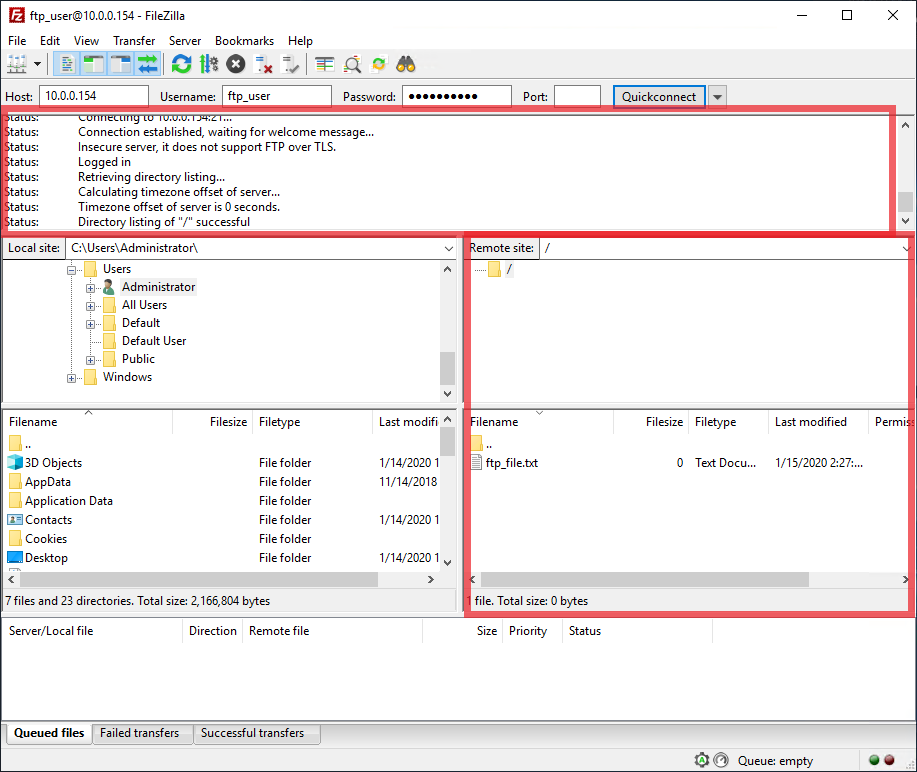
We can now transfer your files over FTP to the Windows Server.
I hope this helps and if you got questions, comments, reactions, suggestions or requests let me know on the comments section below.