Below are detailed instructions on how you can setup Active Directory on your Windows Server 2016.
Sections on installing Active Directory.
- Change the Computer Name
- Install Active Directory Feature
- Promote Server to a Domain Controller
- Testing Active Directory Installation
- Additional Notes
Note: You can only do the steps below if you are an Administrator of your Windows Server.
Change the Computer Name
This is an optional step, but I would highly encourage you to do this so that your computer name will not be like EC2AMAZ-3TVT1HF, but a more descriptive one.
In this case since I am going to use the computer that we will setup as an Active Directory Domain Contoller I shall name my Windows Server as DC01.
In fact, you will have a lot of problem if you rename your computer after installing Active Directory. So better do it now before continuing to the next step.
Follow the steps on my post to change the Computer Name of your Windows Server 2016.
For now check the System Information page of the Windows Server.
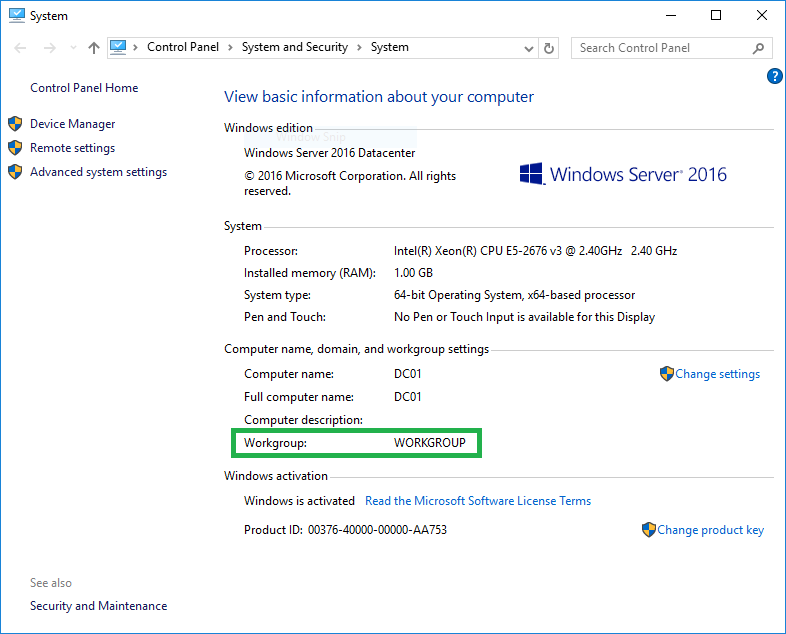
Note the Workgroup.
Install Active Directory Feature
Now that we have updated the Computer Name of our Windows Server we can now start installing Active Directory.
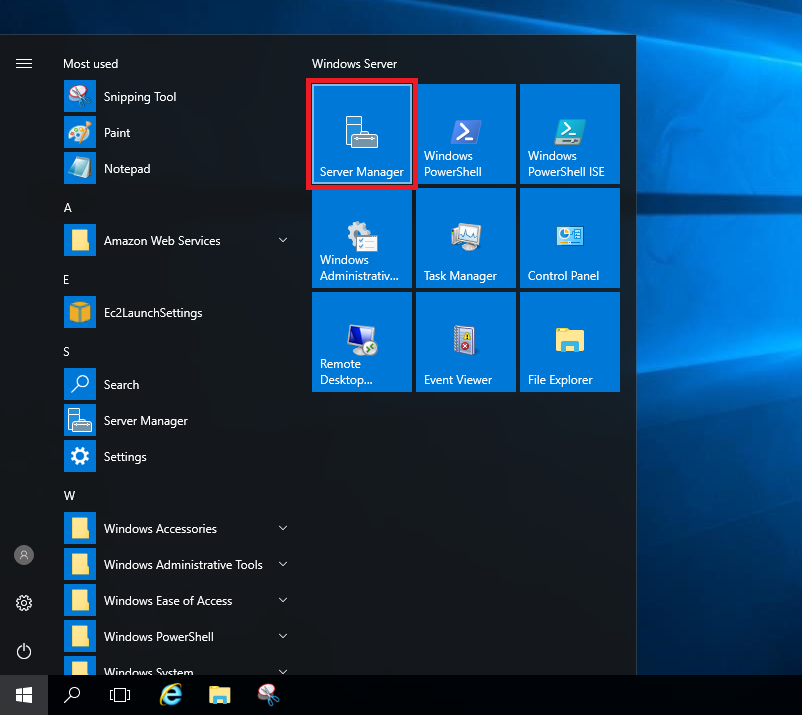
Click on the Window Icon on the bottom-left side of the screen. Click Server Manager from the Menu.
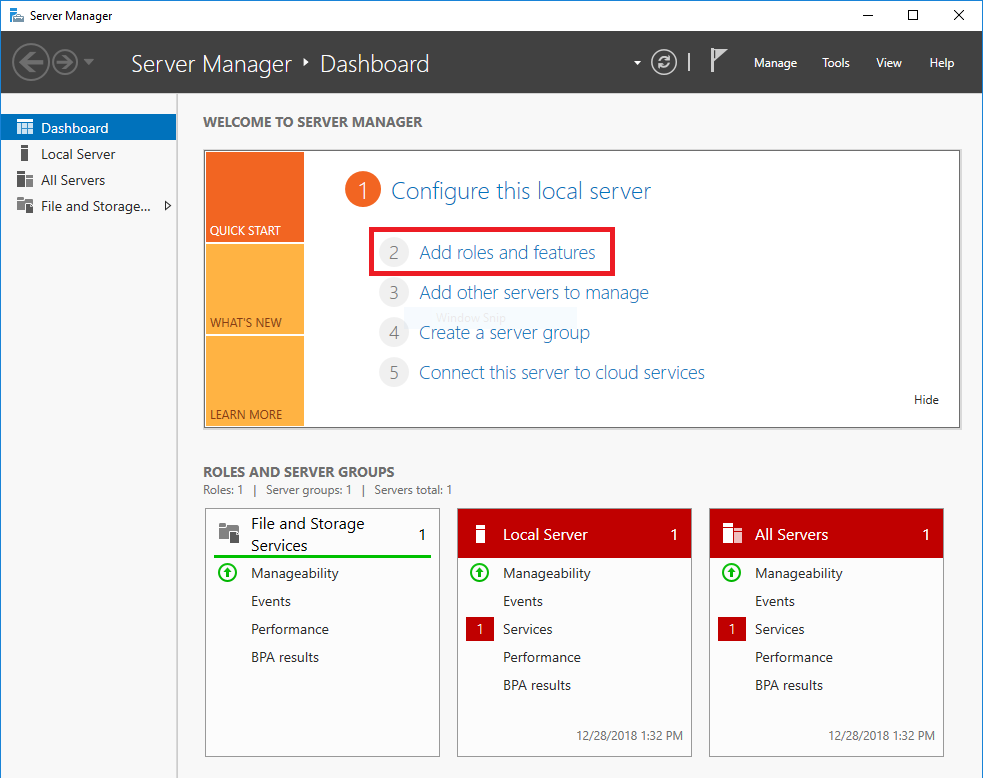
On the Server Manage Window click on Add roles and features.
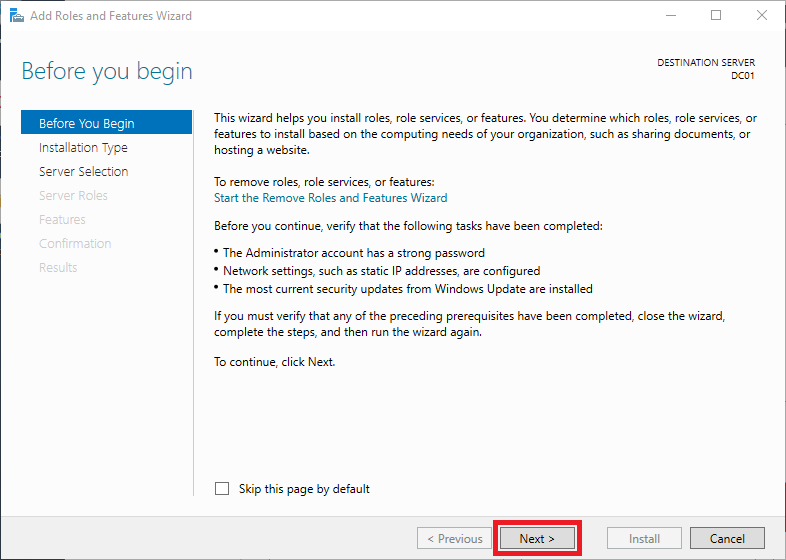
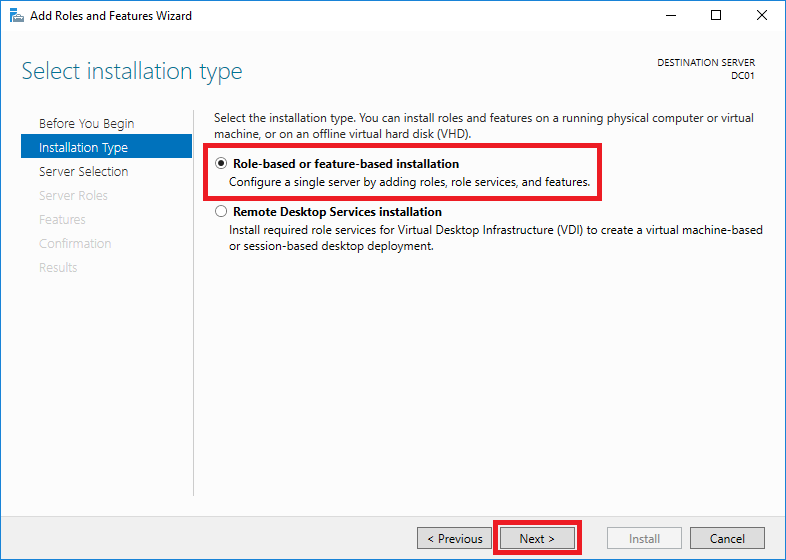
The Add Roles and Features Wizard Window will show up. Click Next.
Make sure that Role-based or feature-based installation is selected then click Next.
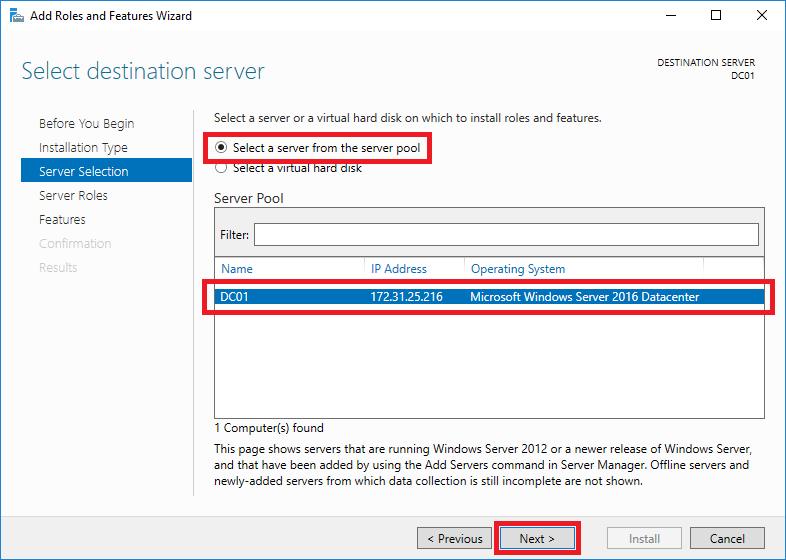
Ensure that Select a server from the server pool is selected. Then the current Windows Server is selected on the list. Click Next.
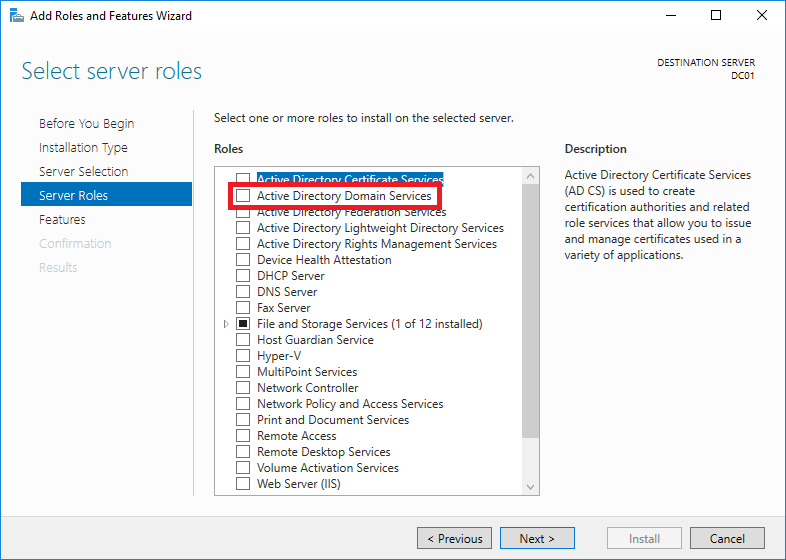
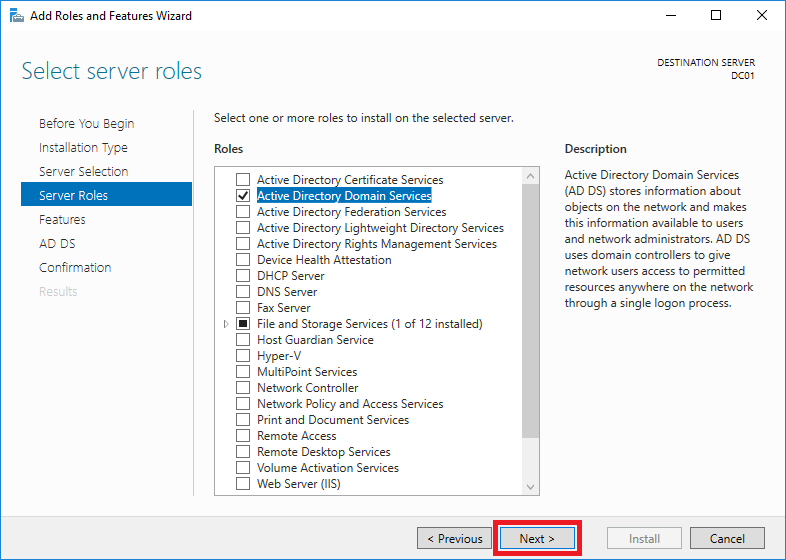
Click on the checkbox of Active Directory Domain Services. The Add Roles and Features Wizard will pop-up.
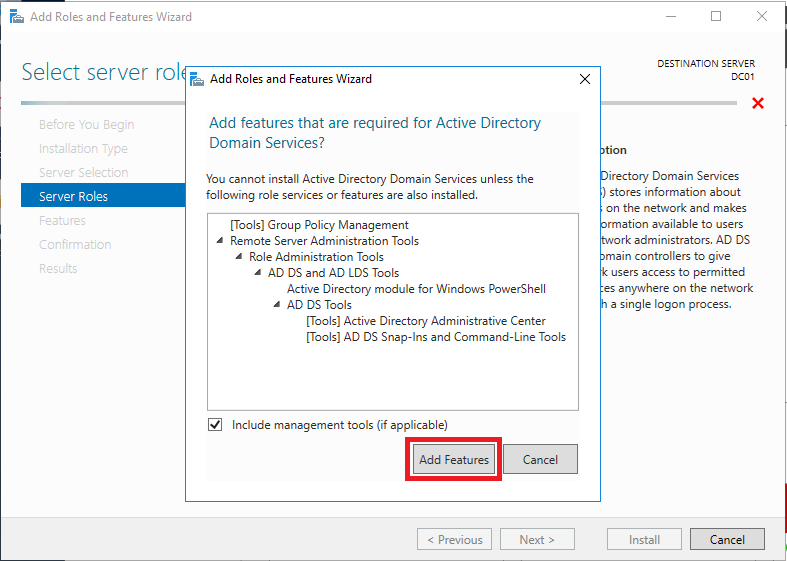
Click Add Features. The window will close.
Now that Active Directory Domain Services is now checked, click Next.
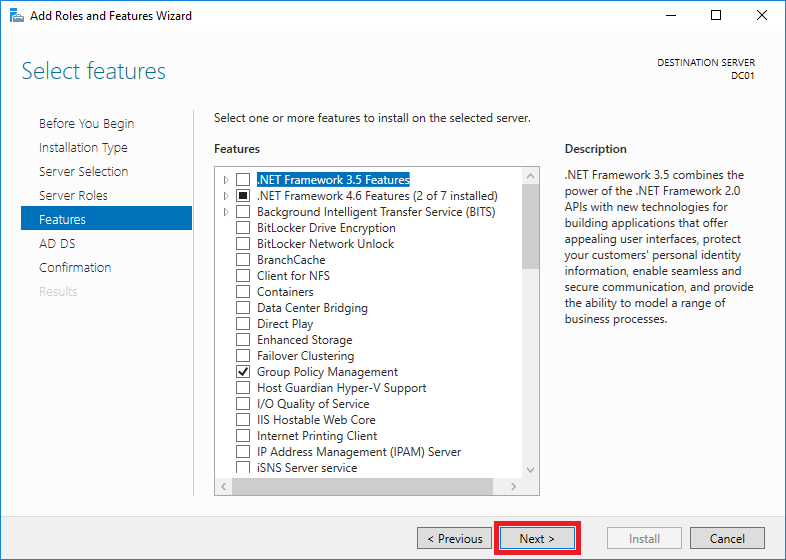
No changes needed on the Select Feature page. Click Next.
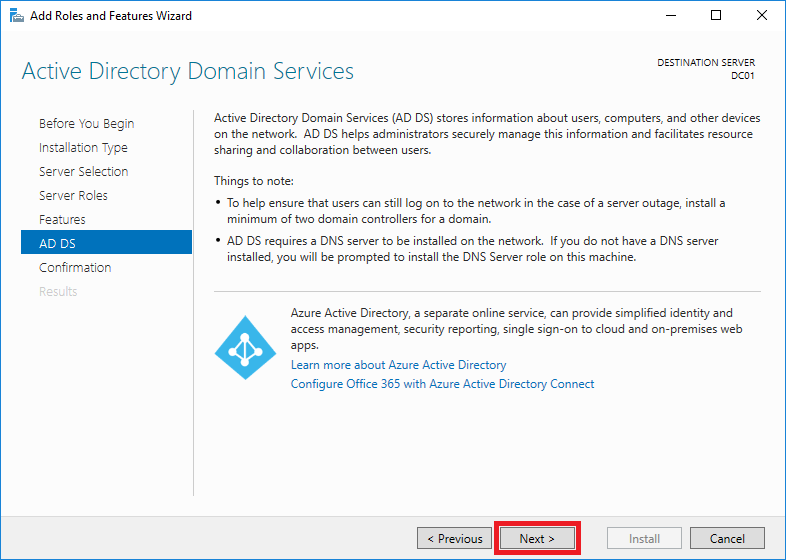
Next will just explain what Active Directory Domain Services is. Click Next.
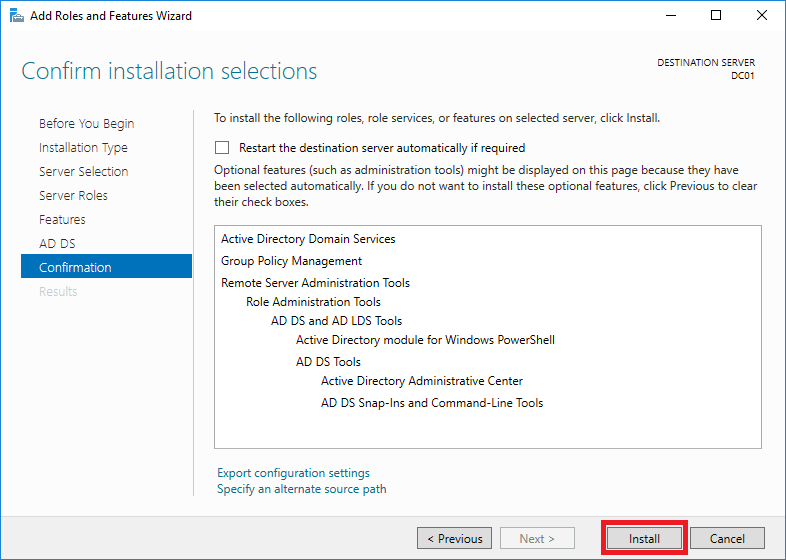
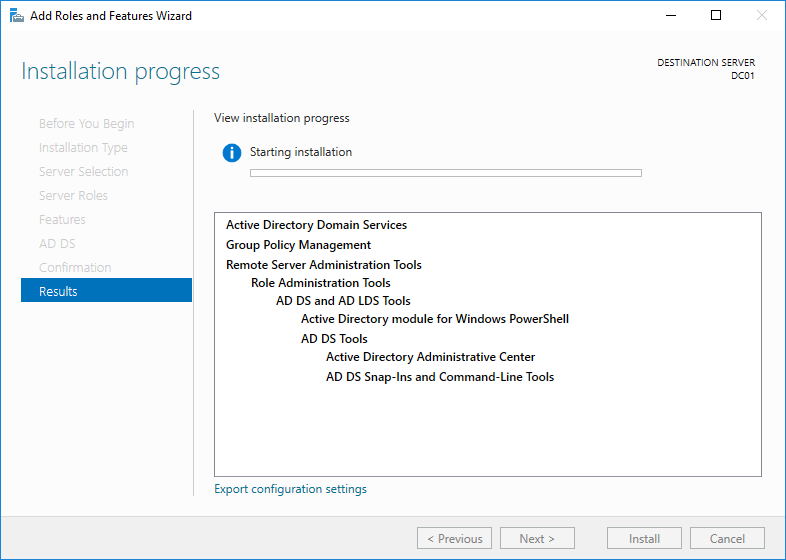
Click Install.
Installation will start and will take around 5 minutes to finish.
Once installation is finished the status bar will be full and it will say Configuration required. Installation succeeded on DC01.
Note: DC01 is the Computer Name that I configured. This might be different from yours.
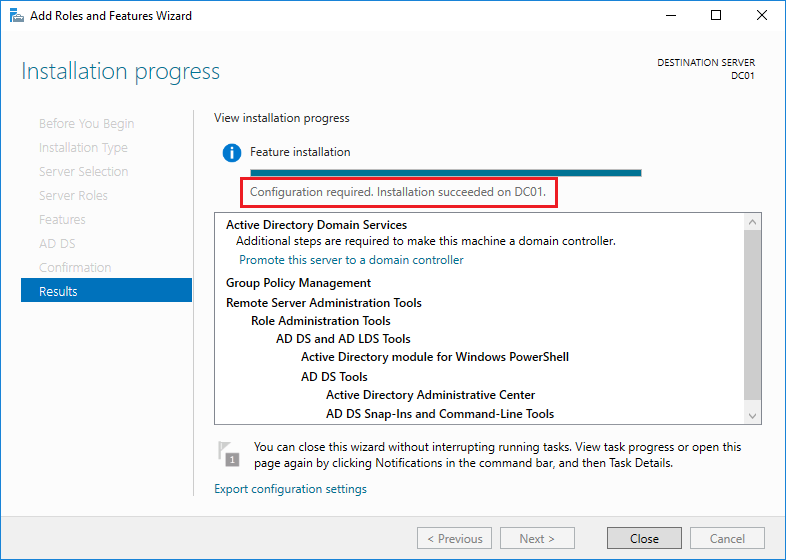
Do NOT click on Close yet as we still have additional configuration to do as the above message says.
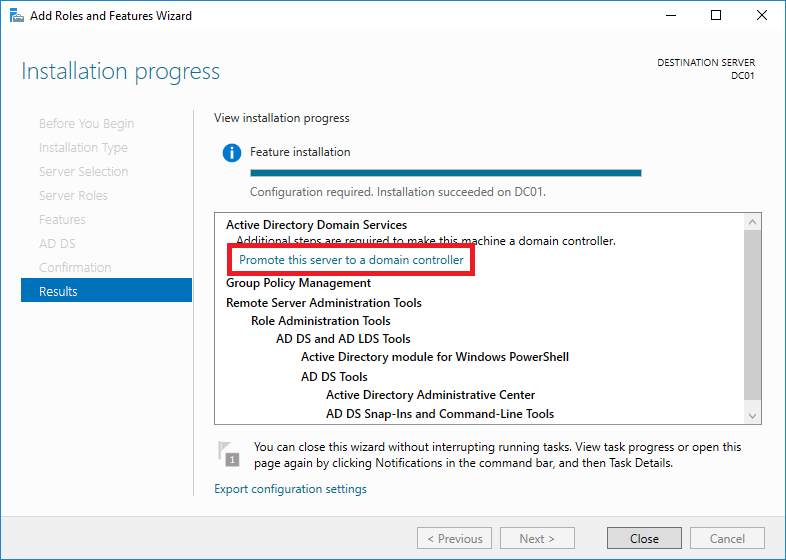
Promote Server to a Domain Controller
Once Active Directory is installed we need to Configure the Windows Server to a Domain Controller.
Note: The Windows Server that you are using is the Primary Domain Controller. For backup we will need to create another Windows Server as Secondary Domain Controller.
Click on Promote this server to a domain controller.
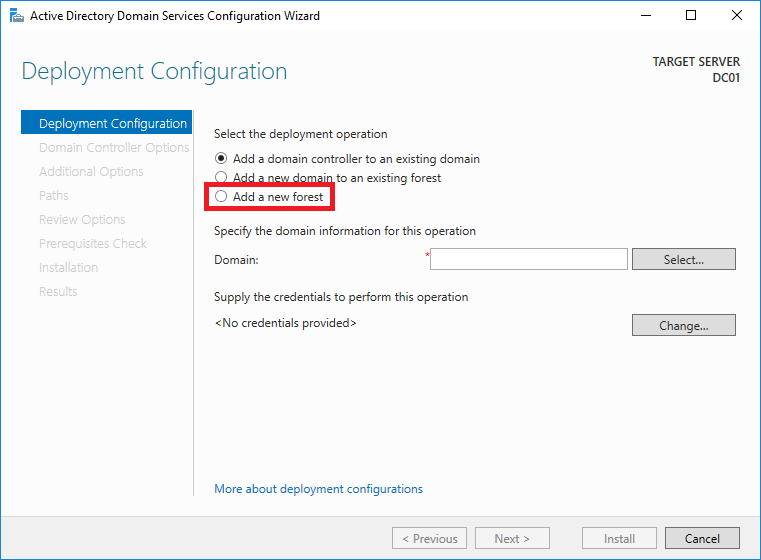
The Active Directory Domain Services Configuration Wizard window will pop-up.
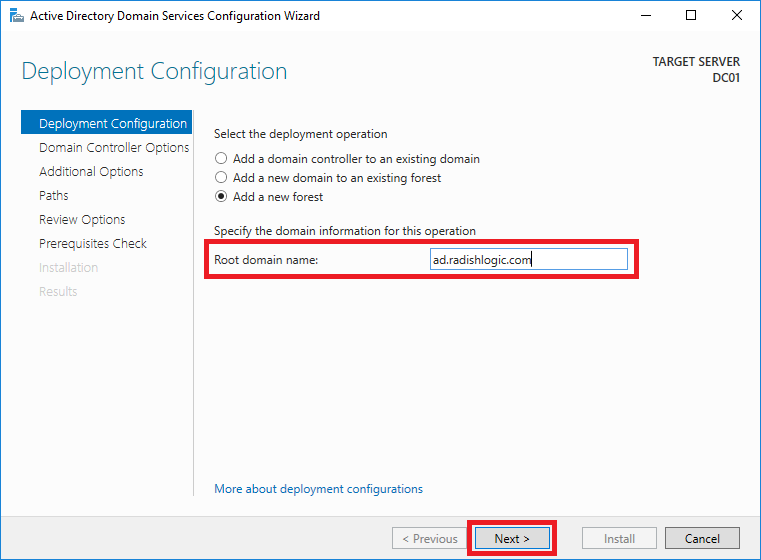
Since this is the first time we are creating an Active Directory Domain Controller select Add a new forest.
Type your target domain name on the Root domain name text box. Then click Next.
My target domain name is ad.radishlogic.com. Yours would be different.
Tip: You can actually put a domain name that you do not own on a domain registry. This was one of the things that took me a while before I could start using Active Directory. You can even put a random domain like jfkdsahyfjkldsa.fhds.
Make sure that Windows Server 2016 is selected on the Forest functional level and Domain functional level, and the following are checked – Domain Name System (DNS) server and Global Catalog.
Fill up the text boxes under Type the Directory Services Restore Mode (DSRM) password. Then click Next.
Note the password you placed in a secure place and somewhere you will remember to get in case a problem occurs in your Active Directory or Domain Controller.

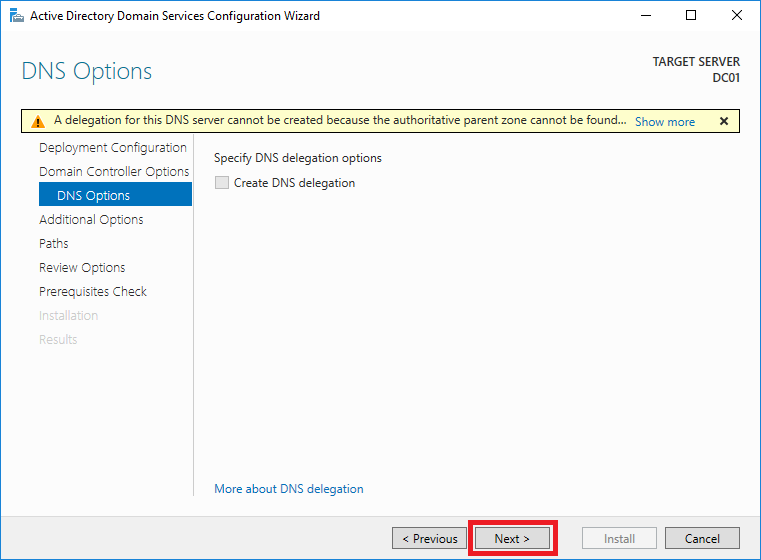
Ignore the warning since you are creating a new Active Directory.
Click Next.
NetBIOS domain name will be automatically filled up, no need to change this unless you want to. Click Next.

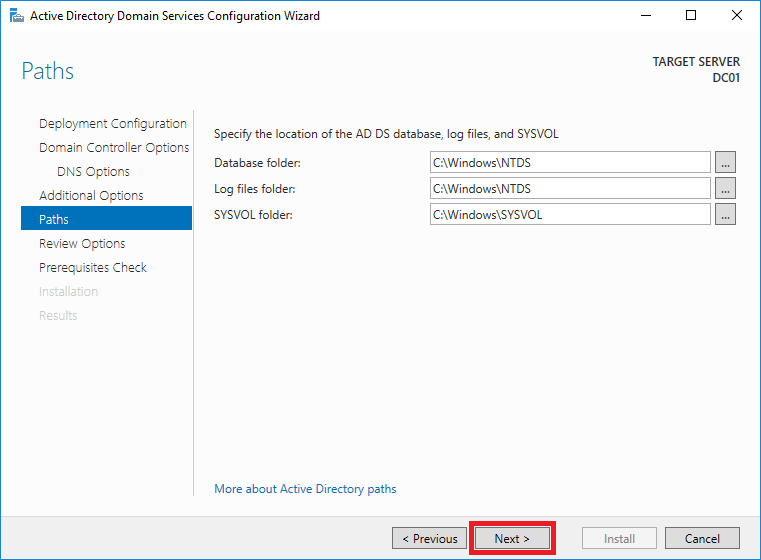
Usually the defaults are okay for the Paths. Click Next.
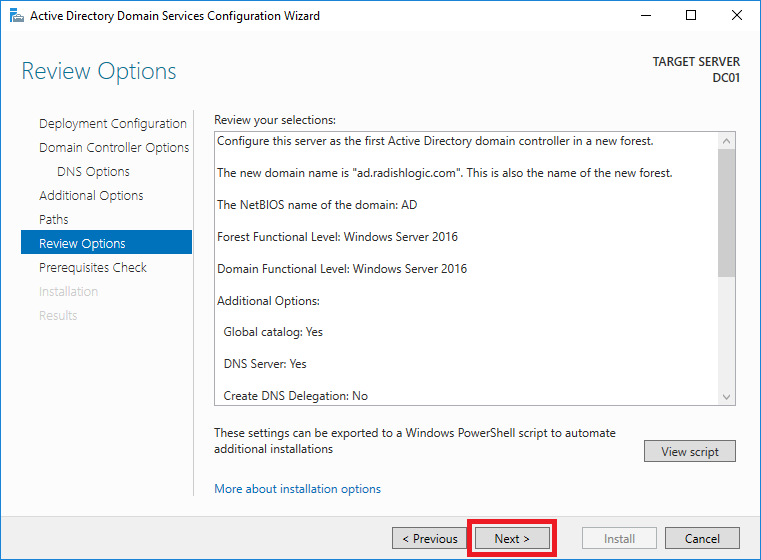
Review the settings then click Next.
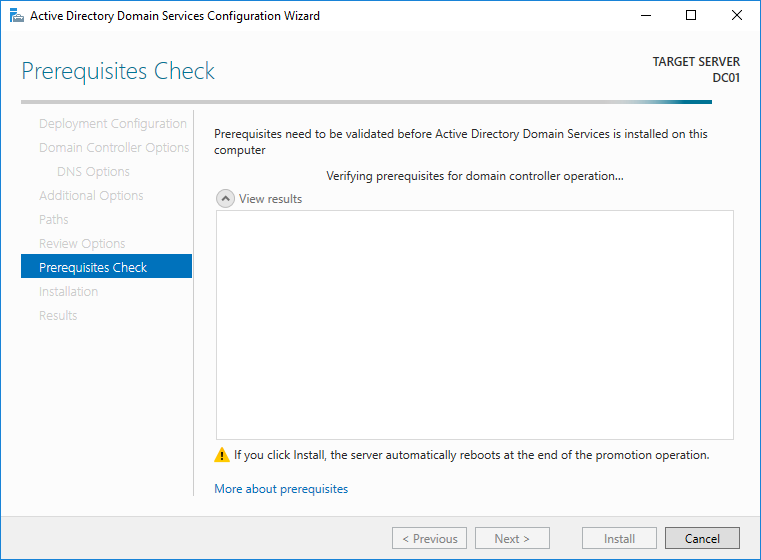
Prerequisites Check will be done and this will take around 3-5 minutes.
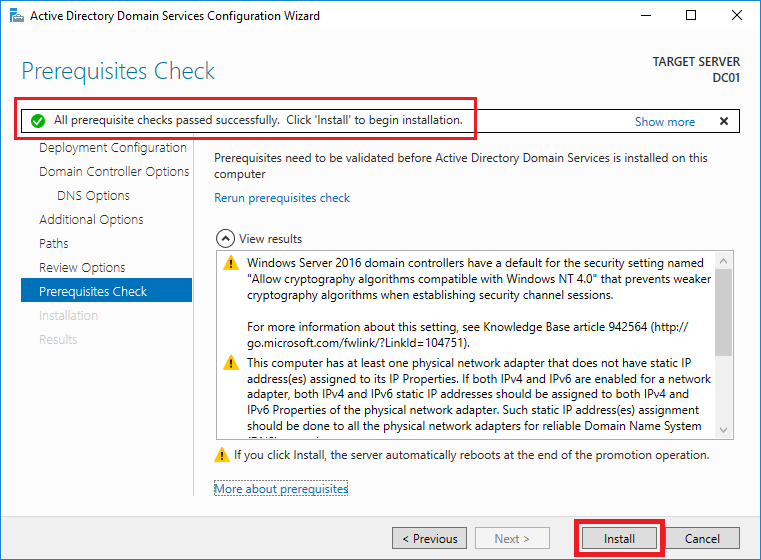
It will say All prerequisite checks passed succesfully. Click ‘Install’ to begin installation once the Prerequisite checks are done.
Click Install.
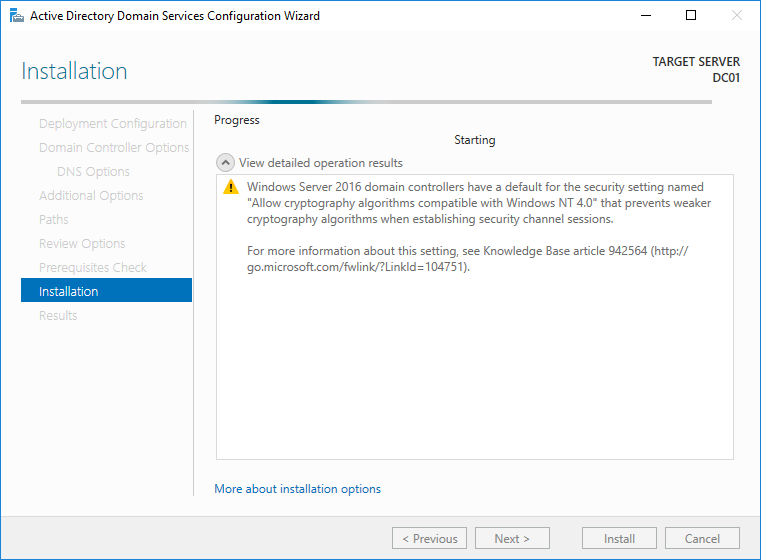
Installation will start. It will take around 5-10 minutes before it finishes.
When it finishes the warning below will appear. Click Close.
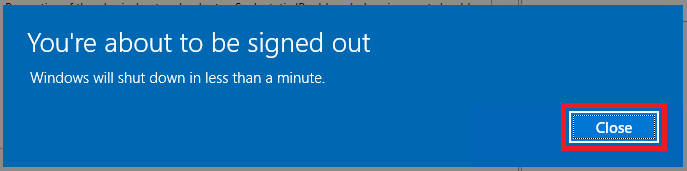
The server will restart.
After around 2 minutes log back in to your Windows Server. In my case I used Remote Desktop Connection since I am running my Windows Server in AWS EC2.
It will do some installation for around 3-5 minutes.

Onced logged in you can check if you have succesfully installed and joined Active Directory.
Testing Active Directory Installation
There following are 3 ways to check if you have installed Active Directory correctly.
1. System Information
Check the System Information of your Windows Server.
You can check Changing the Computer Name of Windows Server 2016 if you do not know how to do this.
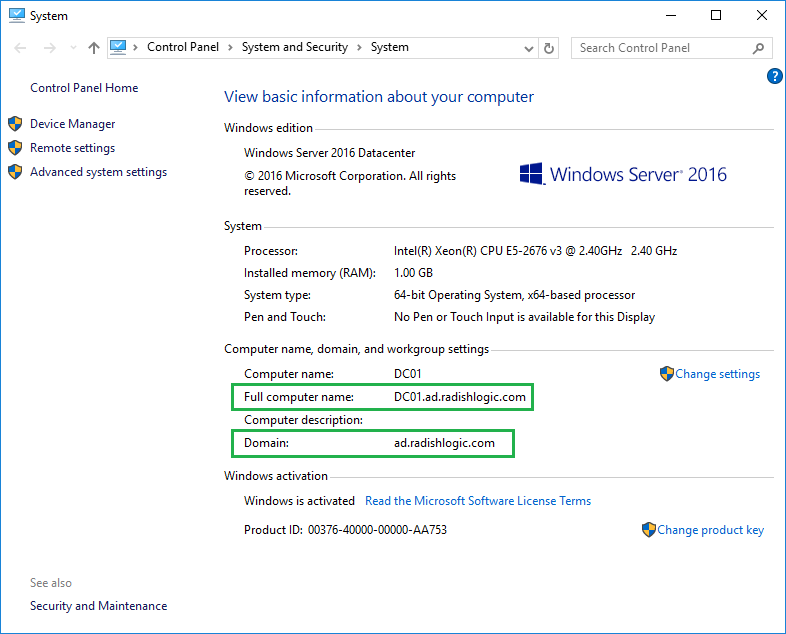
Notice that Workgroup is no longer in the window and is changed to Domain. The Domain is the domain you setup. The Full computer name is the Computer name followed by a dot then the Domain. This shows that your Windows Server has joined the Active Directory that you setup.
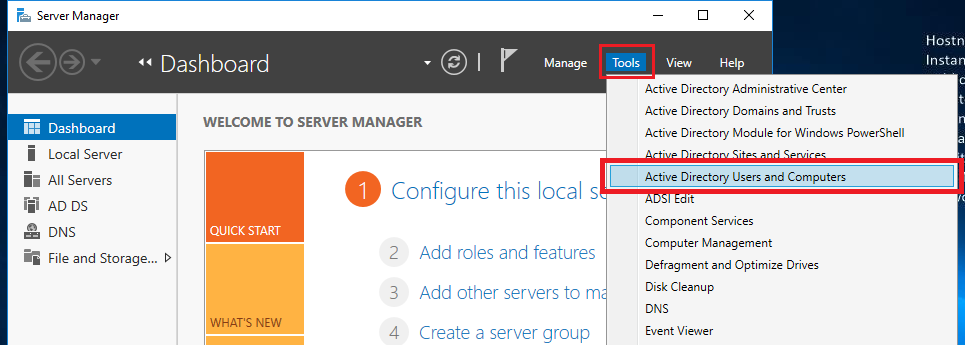
2. Active Directory Users and Computers
Open Server Manager.
Then click on Tools then Active Directory Users and Computers.
On the left column, click on the ‘>’ beside the domain to expand it.
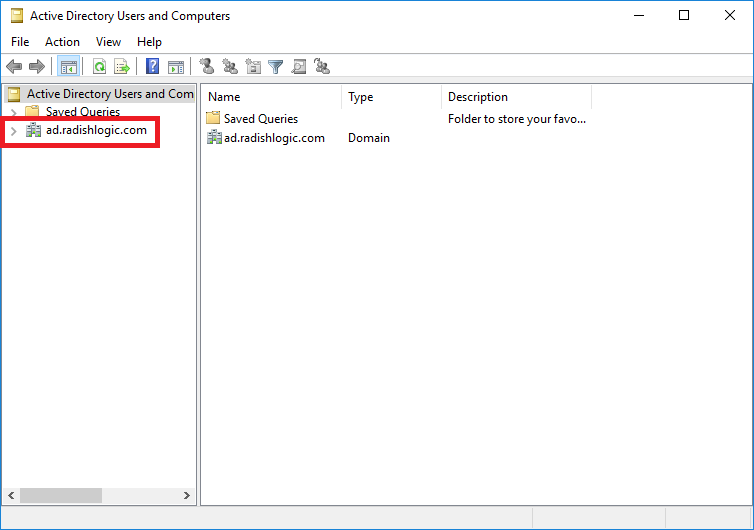
Then click on Users.
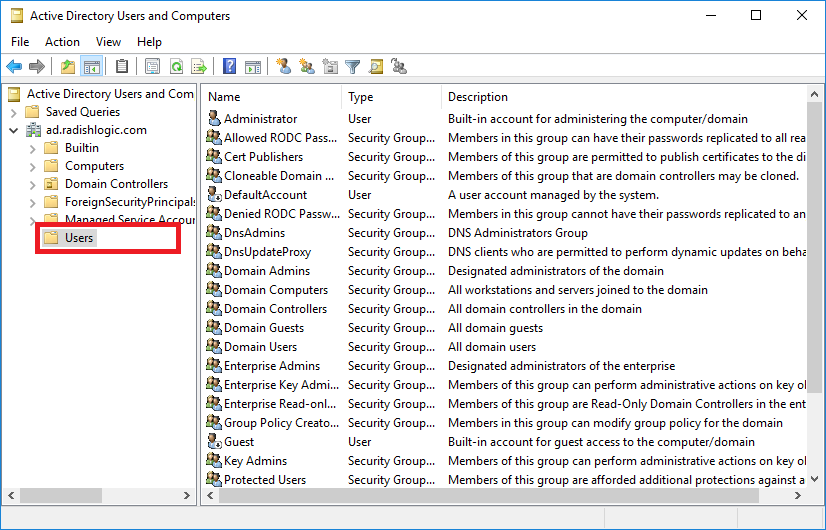
This will show the Administrator user and other Groups for you Active Directory.
The current Active Directory Administrator’s password is the current password you used to login.
Since you are already here you may want to change the password for the Active Directory Administrator.
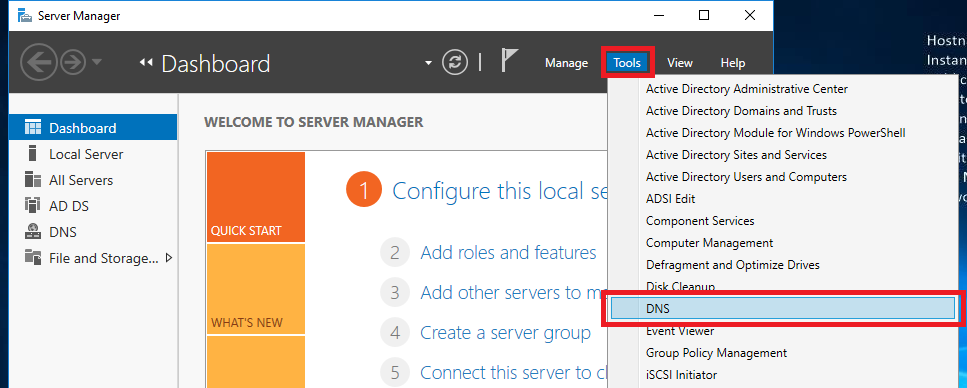
3. DNS Manager
Open Server Manager.
Click on Tools then DNS.
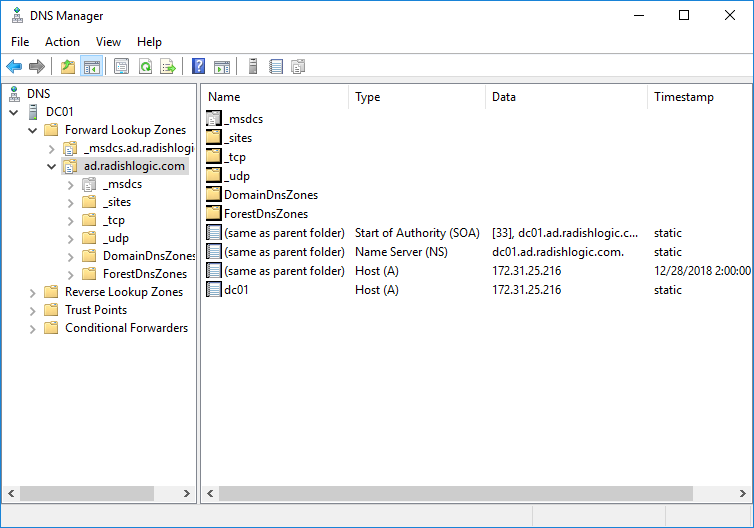
The DNS Manager window will show and click on your Computer Name then Forward Lookup Zone.
Then click on your domain name to see how your Windows Server routes the traffic as the DNS Server.
Additional Note
There are times that the Active Directory Domain Controller fails and the computers attached to it fails to communicate with it, in this case we need a second Active Directory Domain Controller that computers can resolve to.
I hope the above step-by-step instructions helped you on installing Active Directory on your server.
If you have any suggestions, comments or corrections just comment them below. I will be happy to hear your thoughts as I get to learn more.