We have recently purchased an Adafruit Circuit Playground. I was really excited to finally able to hold it as it is a small board packing with a lot of features. Some of the features I have not used yet.
Here are the list of features of the Adafruit Circuit Playground.
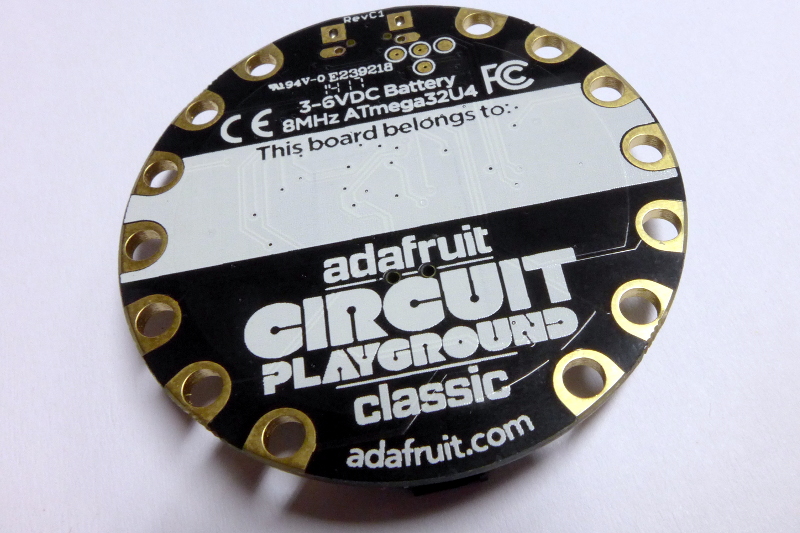
- Board Dimension: 50.6mm (2.0 inches) in diameter
- Weight: 8.5 grams
- ATmega32u4 Processor (3.3V, 8MHz)
- MicroUSB for programming and debugging with Arduino IDE and power
- USB port can act like serial port, keyboard, mouse, joystick or MIDI
- 2 pin JST port for Power (3-6V)
- 10 mini NeoPixels (each can display any color)
- 1 Motion Sensor (LIS3DH triple-axis accelerometer with tap detection, free-fall detection)
- 1 Temperature Sensor (thermistor)
- 1 Light Sensor (phototransistor)
- 1 Sound Sensor (MEMS microphone)
- 1 Mini Speaker (magnetic buzzer)
- 2 Push Buttons
- 1 Slide Switch
- 8 alligator-clip friendly input/output pins (pads)
- Includes I2C, UART, and 4 pins that can do analog inputs/PWM output
- All 8 pads can act as capacitive touch inputs
- Green Power LED
- Basic Blinking LED (#13)
- Reset button
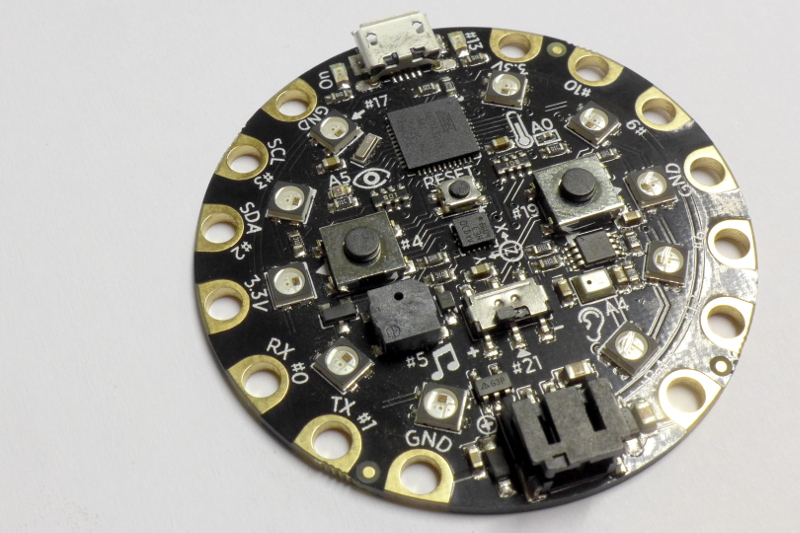
This post is about being up close and personal with the Adafruit Circuit Playground so here are the photos that you have been looking for.
If you are interested in buying the Adafruit Circuit Playground you may purchase this by buying it directly from Adafruit here.
- Sizing
- Different Angles
- USB Port and JST Battery Port
- Light and Temperature Sensor
- Microphone and Mini Speaker
- Accelerometer
- Buttons and Switches
- LEDs and NeoPixels
- Input/Output Pads
- Reset Button and Power LED
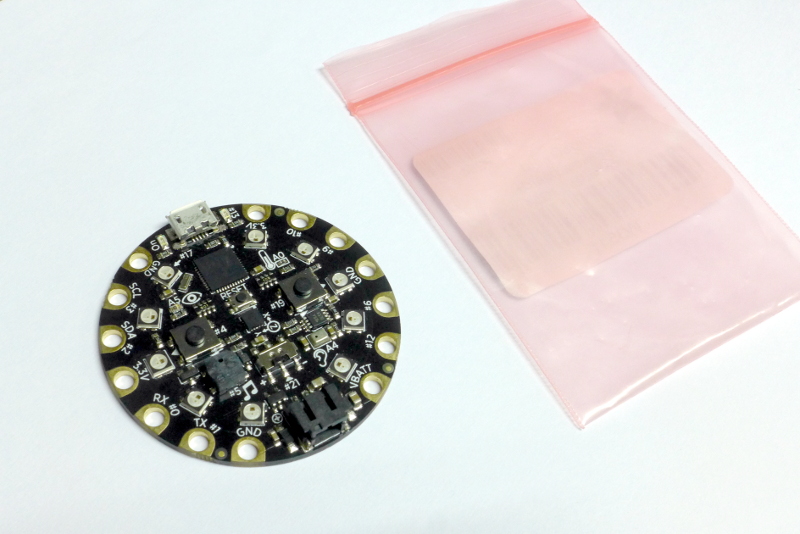
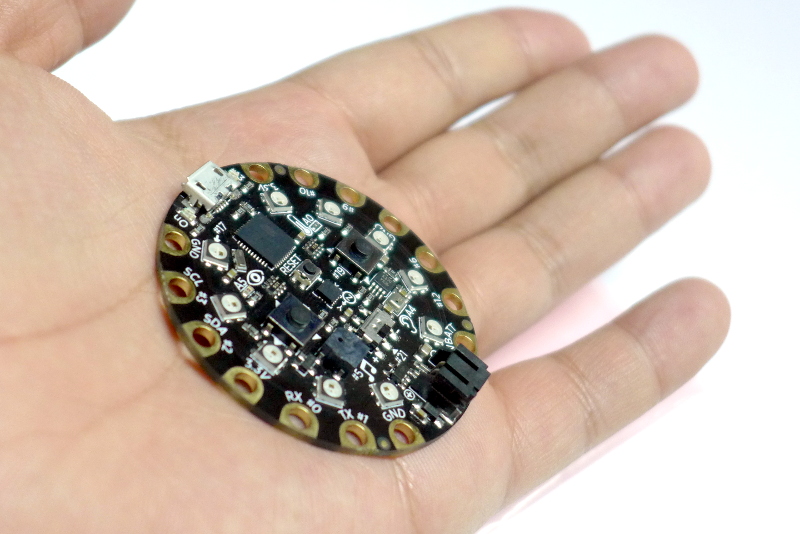
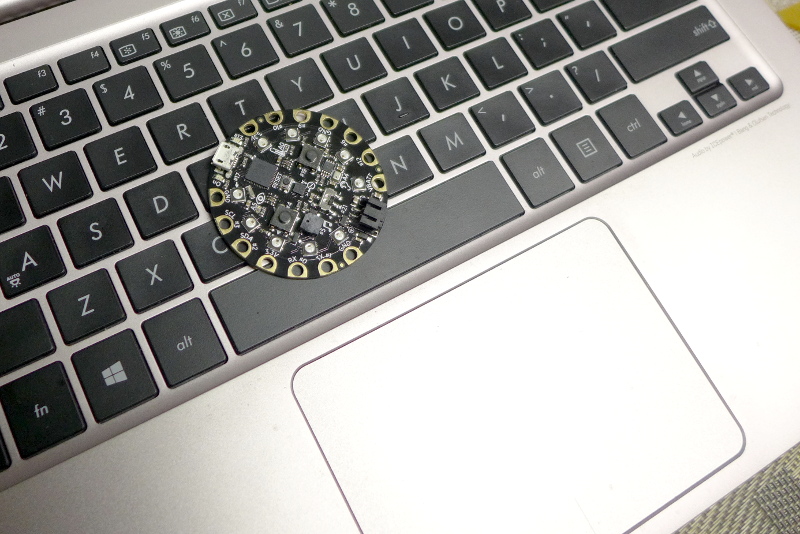
Sizing
To get the feel of the size of the Adafruit Circuit Playground I took pictures of it compared to other things.
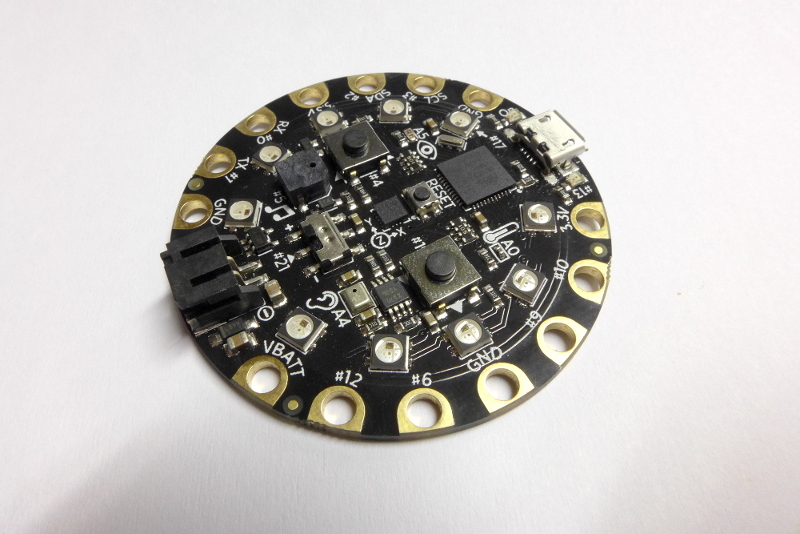
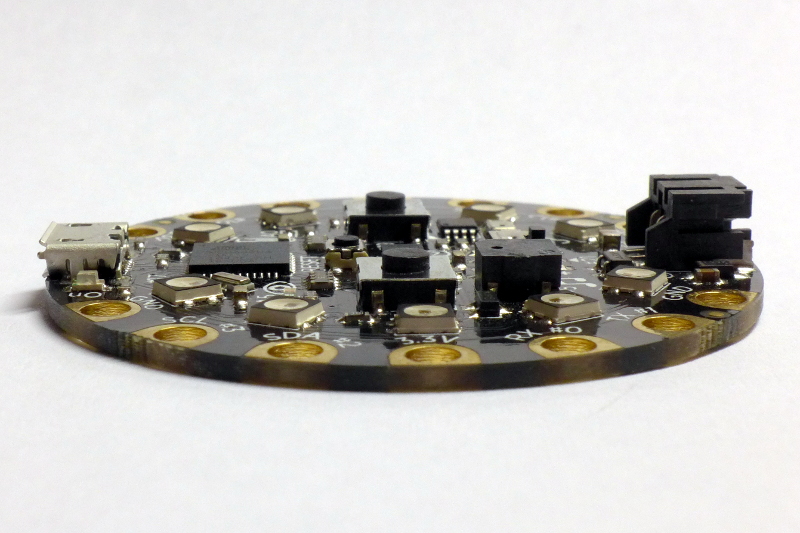
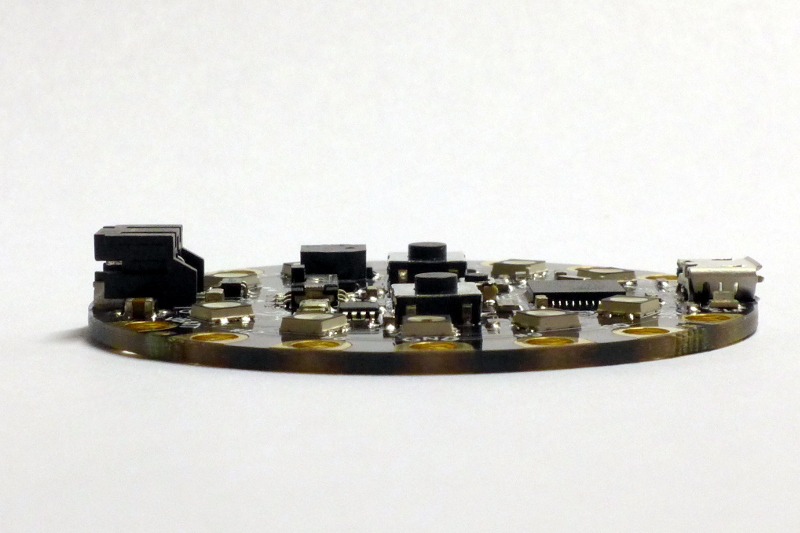
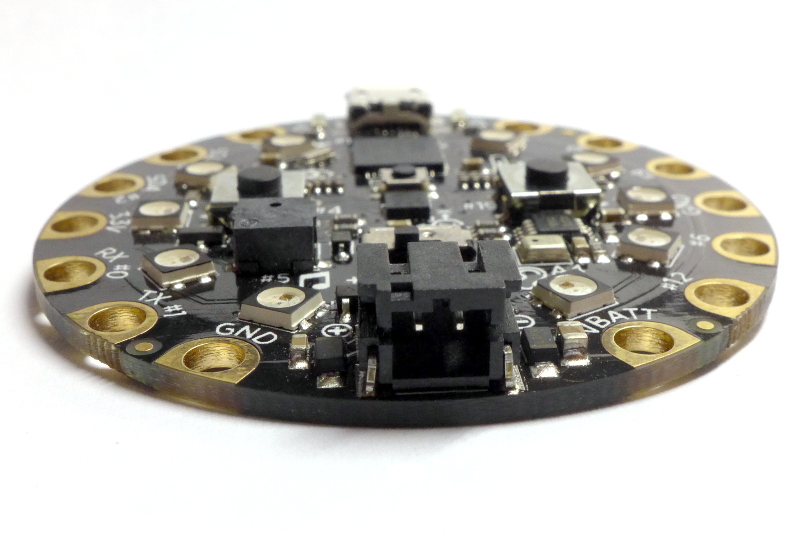
Different Angles
If you are curious what the Adafruit Circuit Playground looks like on different angles here are some photos that you might like.

USB Port and JST Port for Battery
The USB Port is used for programming the Adafruit Circuit Playground via the Arduino IDE. You will need to install the Circuit Playground board to it before you can use it to program that board.
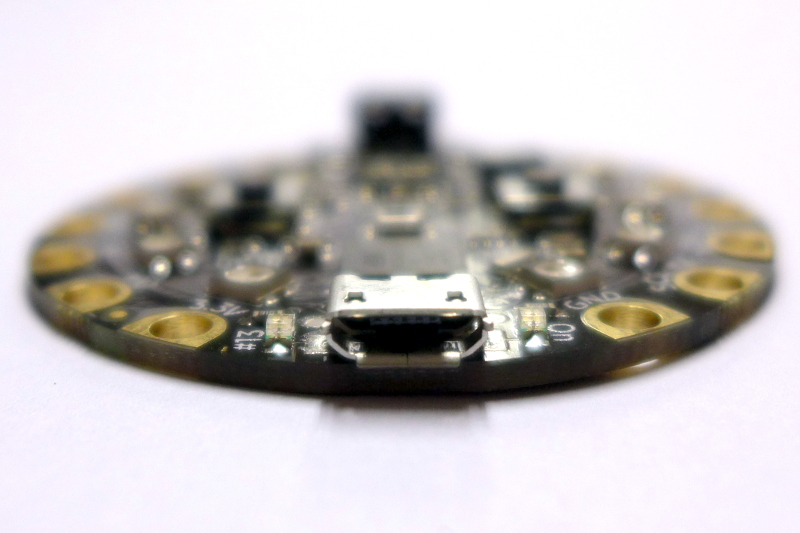
What I usually use is the microUSB Cable for my Android Phone.
Sometime I also use the JST Port for the battery but always seldom since batteries that are compatible with it is not readily available to me.
If ever that I need to turn on the Adafruit Circuit Playground without the need to program it or I just do not want a computer attached to it I just use microUSB cable and attach it to a powerbank for my phone.
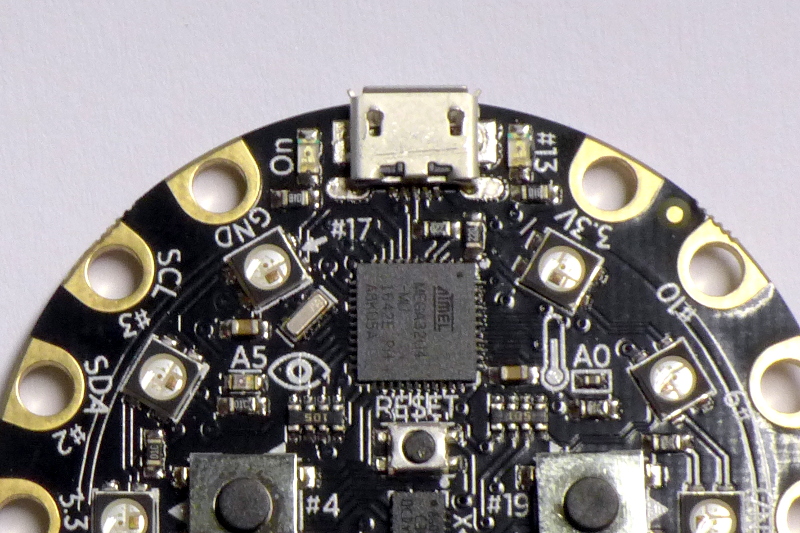
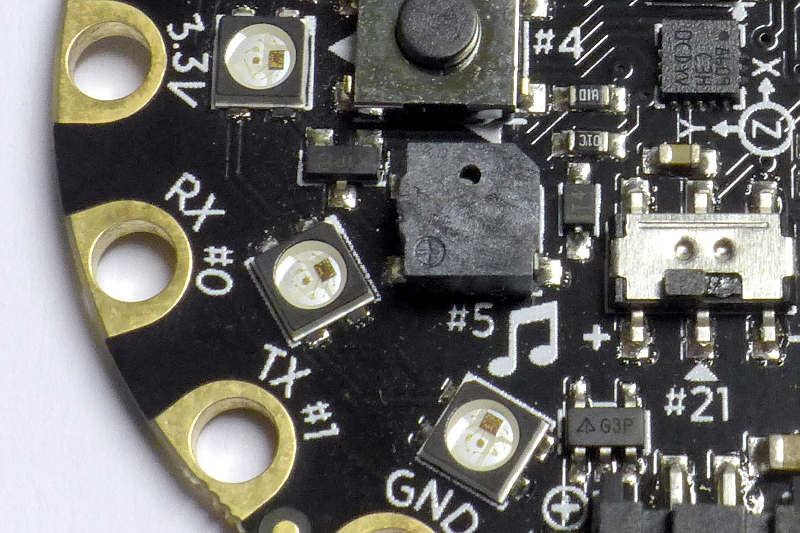
Light and Temperature Sensor
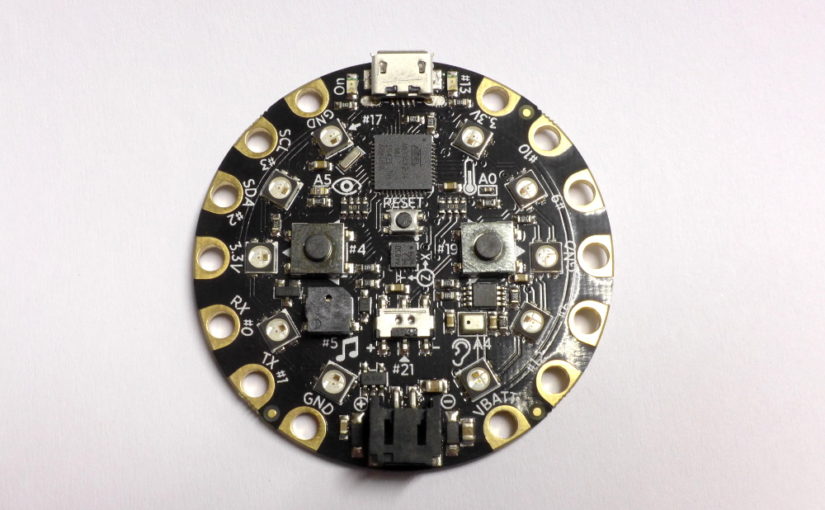
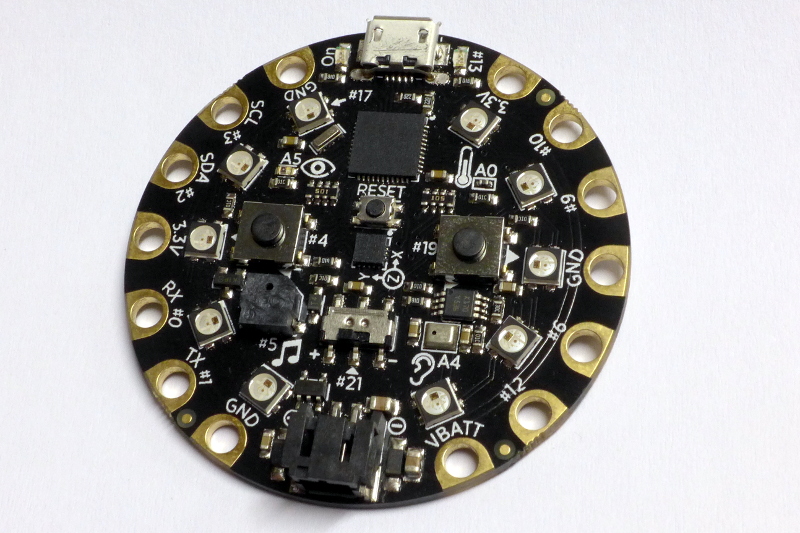
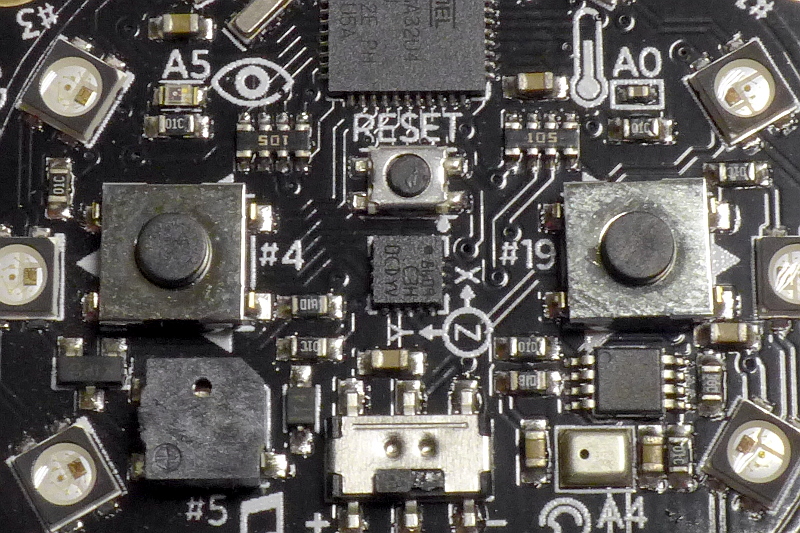
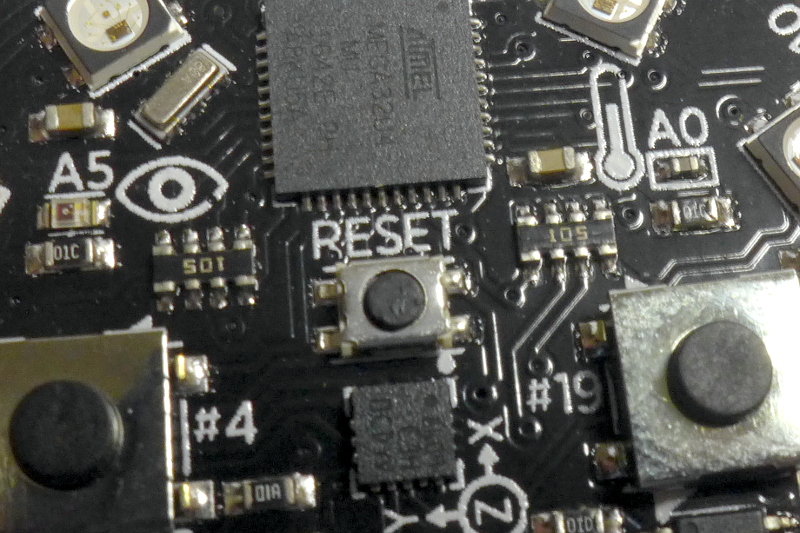
The light sensor can be found near the ATmega32u4. Its indicator is the eye symbol. The intensity of the light can be measured by doing an analog read to the A5 pin of the ATmega32u4.
If you are curious what phototransistor is used it is the ALS-PT19-315C.
![]()
I checked the documentation of the Circuit Playground and as it turns out that there is a way to detect color using the phototransistor.
The temperature sensor is also located near the ATmega32u4 but on the opposite side of the light sensor. It is indicated by the Thermometer Symbol and can be accessed by the microcontroller by analog reading the A0 pin.
The thermistor used here is the NCP15XH103F03RC.

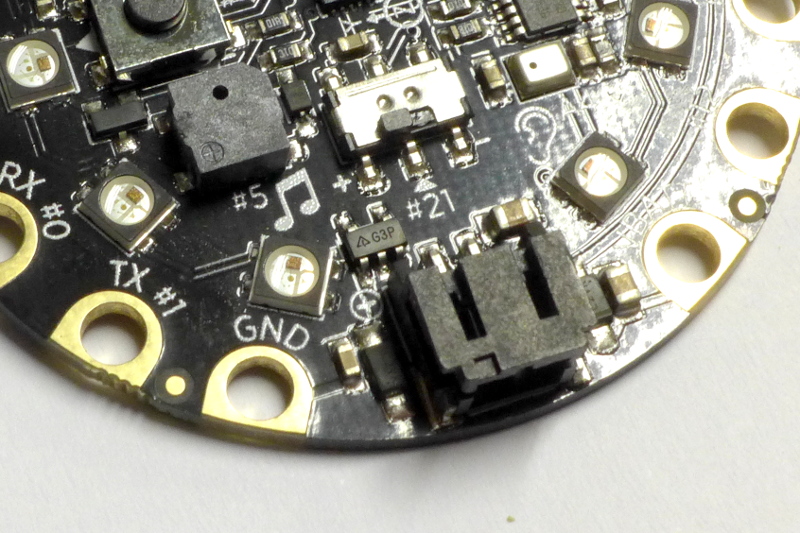
Microphone and Mini Speaker
The microphone can be located near the JST Port for the Battery. Its symbol is the ear and can be accessed by analog reading the A4 pin of the microcontroller.
The MEMs Microphone that was used is the SPW2430HR5H-B.

The Mini Speaker can also be located near the JST Port for the Battery but it is on the opposite side of the Microphone. Its symbol is the musical notes. Sound can be played by changing the frequency of the pin #5.
The Mini Speaker that was used here is the SQMS5002S4036A.
Accelerometer
Accelerometer sensor is located in the middle of the board. Its symbol is the XYZ. The X-axis is located along the arrow point to X, same with the Y-axis. The Z is located inside a circle, this means that the Z-axis is perpendicular from the board.
The accelerometer used is the LIS3DH.
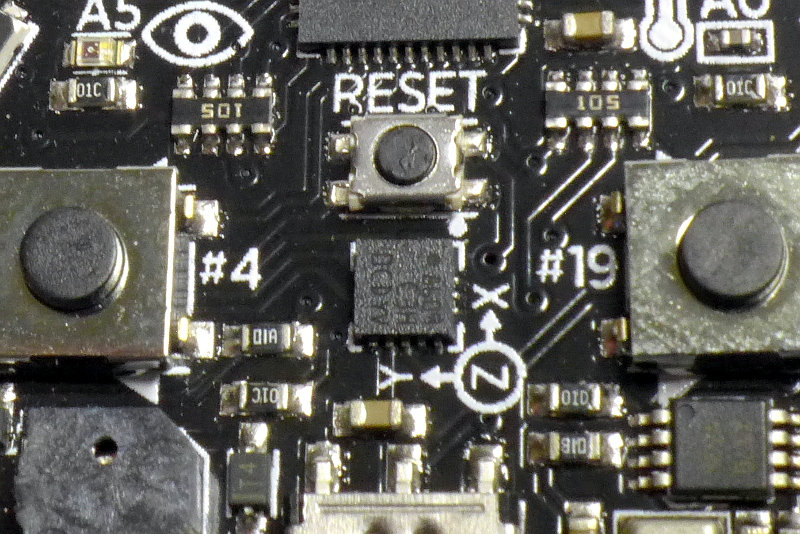
Buttons and Switches
The 2 Push Buttons (Tact Switches) are located beside the accelerometer of the Circuit Playground. Their symbol are the #4 and #19, which also means that they can be accessed by doing a digital read on pins #4 and #19.
For simplicity Adafruit made a function for each button, leftButton and rightButton, where Left Button is #4 and Right Button is #19.
Note that these push buttons are Low, so when you push the buttons its state would become High.
The Slide Switch is located below the Accelerometer and right between the Mini Speaker and Microphone. Its symbol is #21, which also indicates that you can read this by doing a digital read on pin #21.
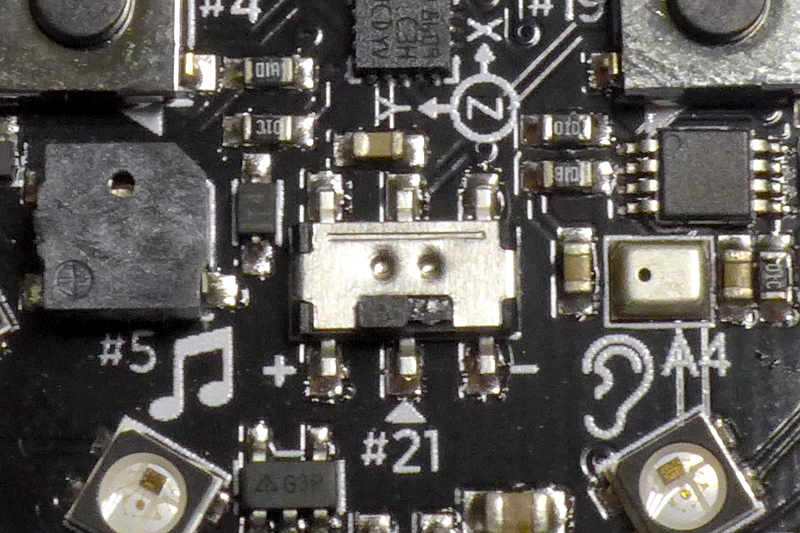
If the switch is on the Left Side (+) then the reading would be High, if on the left (-) then the reading would be Low.
LED and NeoPixels
The LED #13 can be located near the microUSB port. As a standard Arduino Boards pin #13 always has a LED attached to it so you can try programming the microcontroller board and to check you would blink the LED on pin #13.
By the way, the LED #13 on the board is color Red.

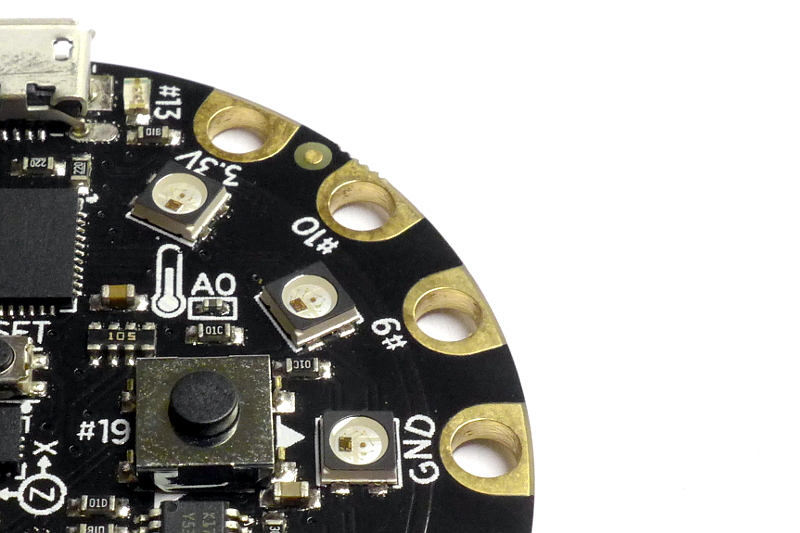
The Adafruit Circuit Playground has 10 NeoPixel LEDs that can display any color. You just have to mix the amount of Red, Green and Blue (RGB) on each.
They are located around the Cicuit Playground just under the Input/Output Pads.
![]()
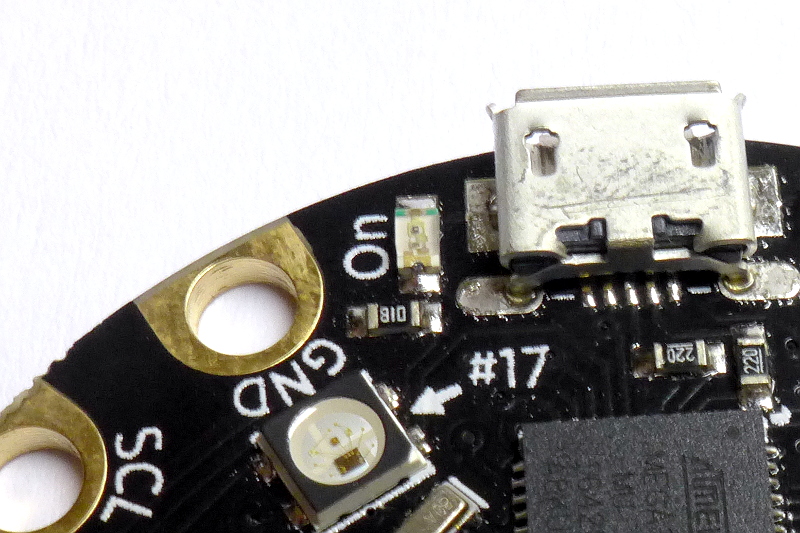
If you noticed that the NeoPixels has an arrow pointing to it with #17, it just means that all the NeoPixels is controlled via pin #17 of the ATmega32u4.
![]()
Since the NeoPixels are located around the round board of the Adafruit Circuit Playground the first thing I did was put it on my chest and act like I am an Ironman. I have a good feeling that a lot of us will do that.
Input/Output Pads
Here are the summary of the Input/Output and Power pins/pads that the Adafruit Circuit Playground has.

Power Pins
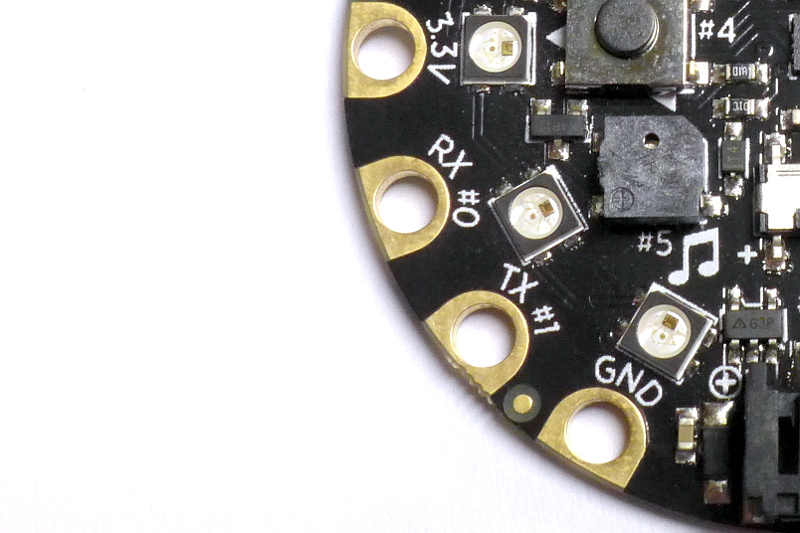
- 2 pads – 3.3V
- 3 pads – Ground (GND)
- 1 pad – VBATT (Battery Voltage)
Input/Output Pads
- pin #0 (RX)
- pin #1 (TX)
- pin #2 (SDA)
- pin #3 (SCL)
- pin #6
- pin #9
- pin #10
- pin #12
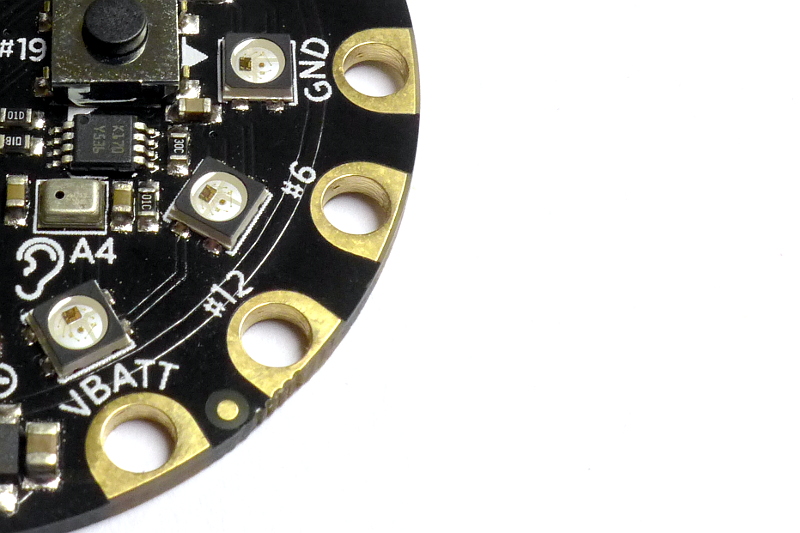
4 of these pins can do Analog Input (#6, #9, #10, #12), same pins can also do Pulse Width Modulation (PWM).
All of the Input/Output Pads can act as a capacitive touch input which the microcontroller can detect and measure on how much pressure you are applying to the pads.
Note: I am having a hard time calling them pins as they are really more like pads. They are designed for the alligator clips to bite on them.
Reset Button and Power LED
Every time I insert the microUSB or the Battery the green Power LED will turn On. This is located beside the microUSB Port. This is a nice indicator if my Adafruit Circuit Playground is properly powered or not.
The Reset Button is located under the AtMega32u4 microcontroller and above the Accelerometer. When pressed it would start the program that was written on the microcontroller.
The annoying thing about the Reset Button is that when I do not clear the NeoPixels on the start of the program it will not reset the NeoPixel. So if you are using the Adafruit Circuit Playground do not forget to clear all the NeoPixels on the start of the program.
So far I am very happy with the purchase of the Adafruit Circuit Playground. I get to play with a lot of components without the doing wirings. Plus I get to experience capacitive touch which I have never tried before I got the Circuit Playground.
I shall be writing more on the Circuit Playground and its functions.